CrowdMaps Documentation
By MapifyPro and PaperTelevision LLC.
Here you’ll find the complete documentation for all things CrowdMaps. You may also download a PDF of this documentation here (right click and select “Save linked file” to download). Don’t have CrowdMaps? Get it Here!
Congrats on your purchase of CrowdMaps!
CrowdMaps is a very straight forward bit of software, but don’t let that fool you. It’s actually very powerful and unique, allowing anyone who visits your site to add customized locations complete with video, photos, and information. Visitors simply double click anywhere on a CrowdMaps-enabled map, add their details, and the location is instantly submitted for moderation, or directly to the map (depending on your preferences).
What you’ll find after installing CrowdMaps:
First up, since CrowdMaps is an add-on that integrates into our core software, it REQUIRES MapifyPro to work correctly. You can buy a bundle here or a solo copy of MapifyPro here.
Installing the plugin is handled just like any other, so we’ll refer you to this video if you don’t know how to do it already: https://youtu.be/AXM1QgMODW0
What’s New in the Admin:
After you’ve successfully installed the plugin, you’ll find the CrowdMaps settings added under your MapifyPro Map Settings (MapifyPro > Maps > [Individual Map Title] or “Add New”). To use CrowdMaps, simply scroll to the lower portion of the page, as shown below. Each item description is outlined below the image.
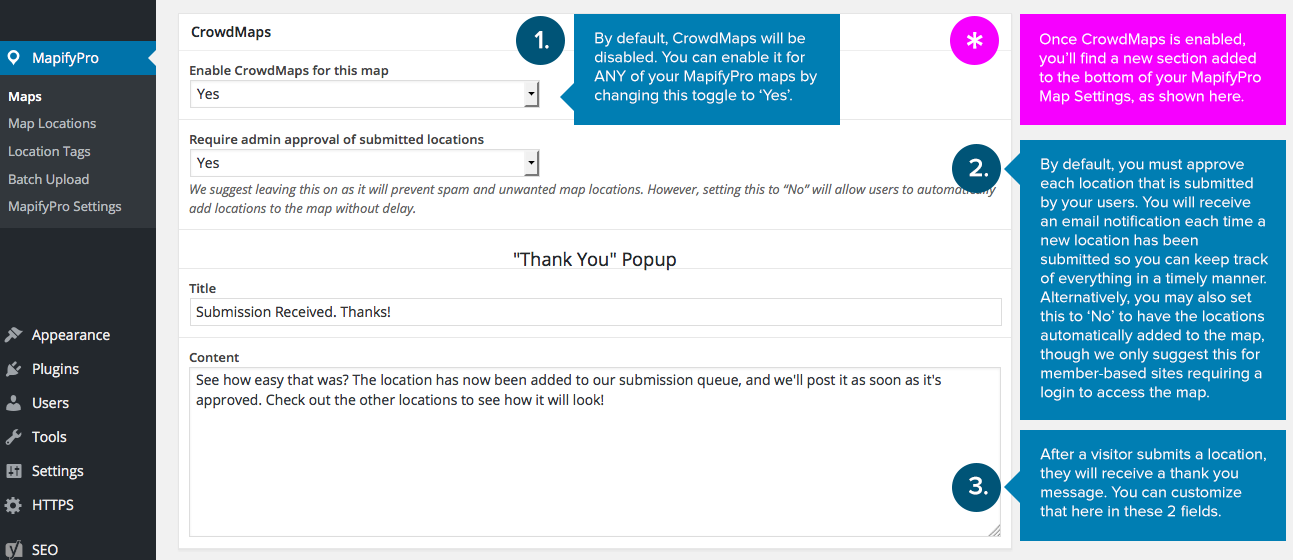
*Once CrowdMaps is enabled, you’ll find a new section added to the bottom of your MapifyPro Map Settings, as shown here.
- By default, CrowdMaps will be disabled. You can enable it for ANY of your MapifyPro maps by changing this toggle to ‘Yes’.
- By default, you must approve each location that is submitted by your users. You will receive an email notification each time a new location has been submitted so you can keep track of everything in a timely manner. Alternatively, you may also set this to ‘No’ to have the locations automatically added to the map,
- though we only suggest this for member-based sites requiring a login to access the map.After a visitor submits a location, they will receive a thank you message. You can customize that here in these 2 fields (title and message content).
Using a CrowdMaps-enabled Map on Your Site:
After you’ve chosen your settings by following the instructions above, your map will now have the CrowdMaps features enabled, and visitors can start adding their own locations! If you’d like to see a CrowdMaps demo, you can find one on this link under the “demo” tab: https://mapifypro.com/product/crowdmaps/
Here’s how it works:
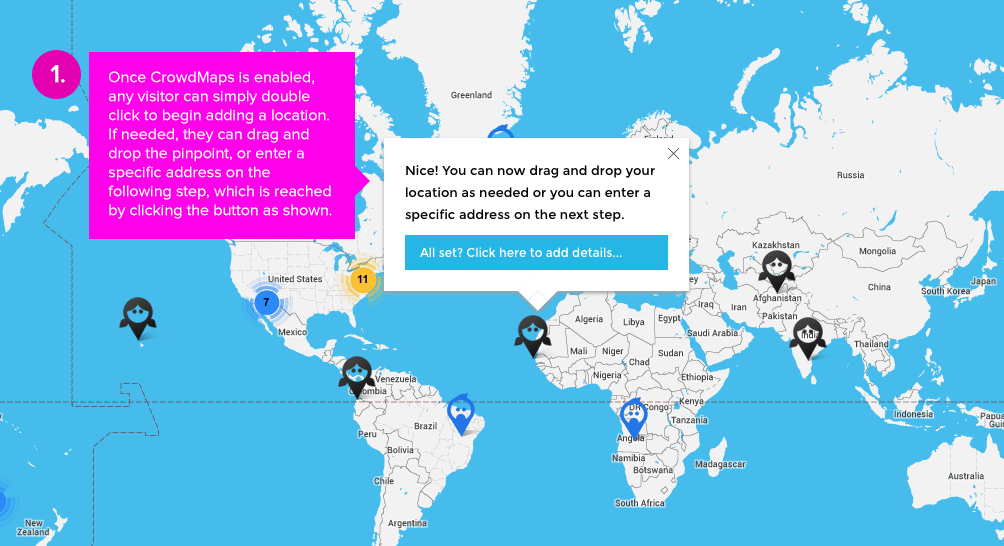
Dropping a pinpoint: Once CrowdMaps is enabled, any visitor can simply double click to begin adding a location. If needed, they can drag and drop the pinpoint, or enter a specific address on the following step, which is reached by clicking the button as shown.
2. Location Details Popup
Next, the visitor will see a pop-up where they can add all important details. This includes Location title, Photos/Video, and location information.
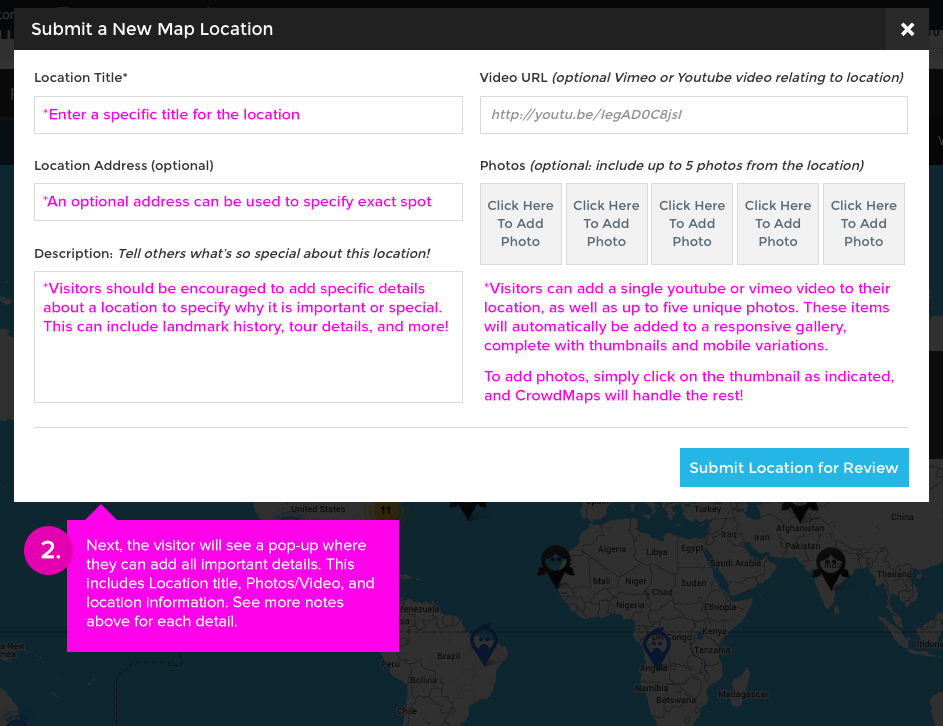
Location Title: Enter a specific title for the location
Location Address: An optional address can be used to specify the exact spot. It will also be entered into the pop-up’s “Location Details” section once approved.
Description: Visitors should be encouraged to add specific details about a location to specify why it is important or special. This can include landmark history, tour details, and more!
Video URL and Photos: Visitors can add a single youtube or vimeo video to their location, as well as up to five unique photos. These items will automatically be added to a responsive gallery, complete with thumbnails and mobile variations.
To add photos, simply click on the thumbnail as indicated, follow the prompts, and CrowdMaps will handle the rest!
3. Thank You Message
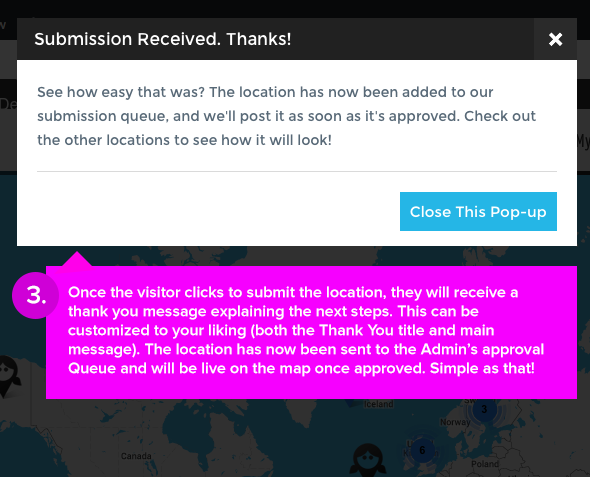
Once happy, the visitor simply clicks the “Submit Location for Review” button, and that’s it! The user will receive a customized Thank You message (which you specify. See the “What’s New in the Admin:” section for more details.) and the location is submitted for approval.
The location will be added to the website admin’s Location Queue until it is approved. The Admin will also receive an email notification each time a new location is submitted. Once approved, it is featured on the map!
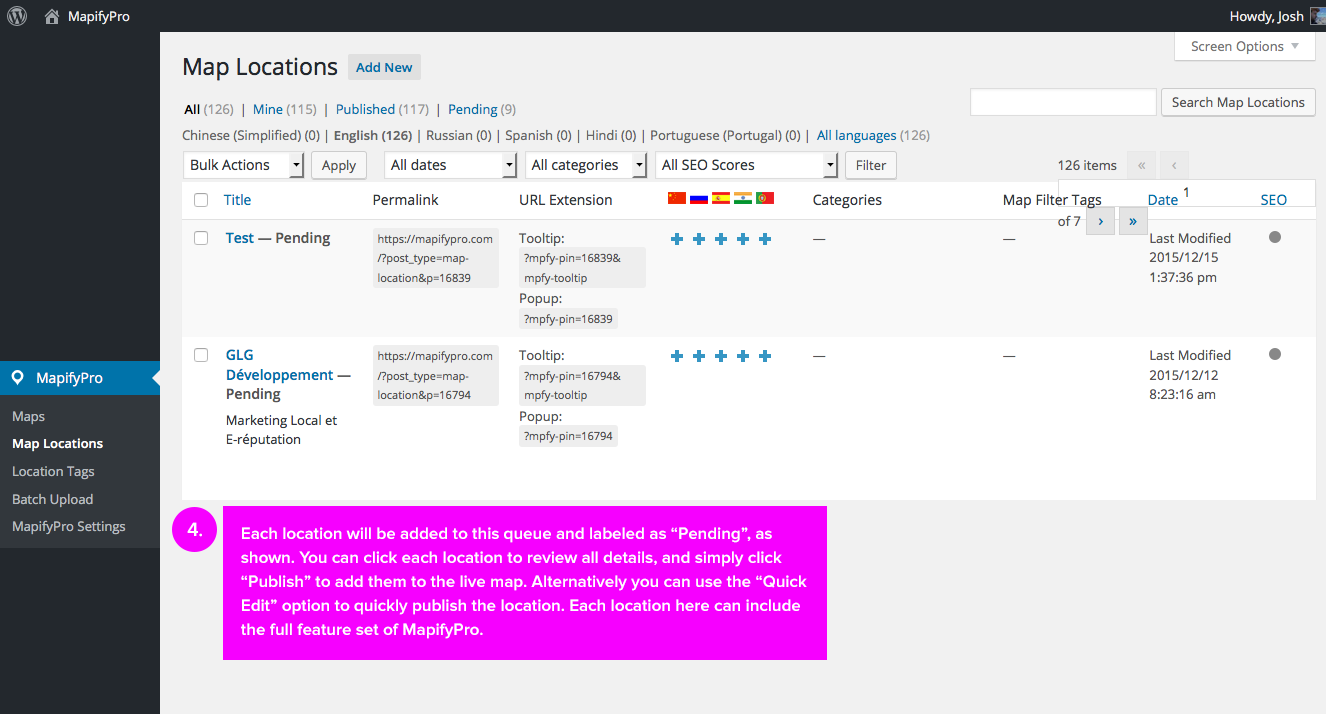
4. Submission Approval
Every time a location is submitted, it will go into your MapifyPro “Map Locations” list and will be labeled as “Pending”. You will also receive an email notification letting you know that you’ve received a new submission. To review and approve a location, simply navigate to the MapifyPro > Map Locations section of your site, as shown below. You can click each location to review all details, and simply click “Publish” to add them to the live map. Alternatively you can use the “Quick Edit” option to quickly publish the location. Each location here can include the full feature set of MapifyPro:
5. Location Added!
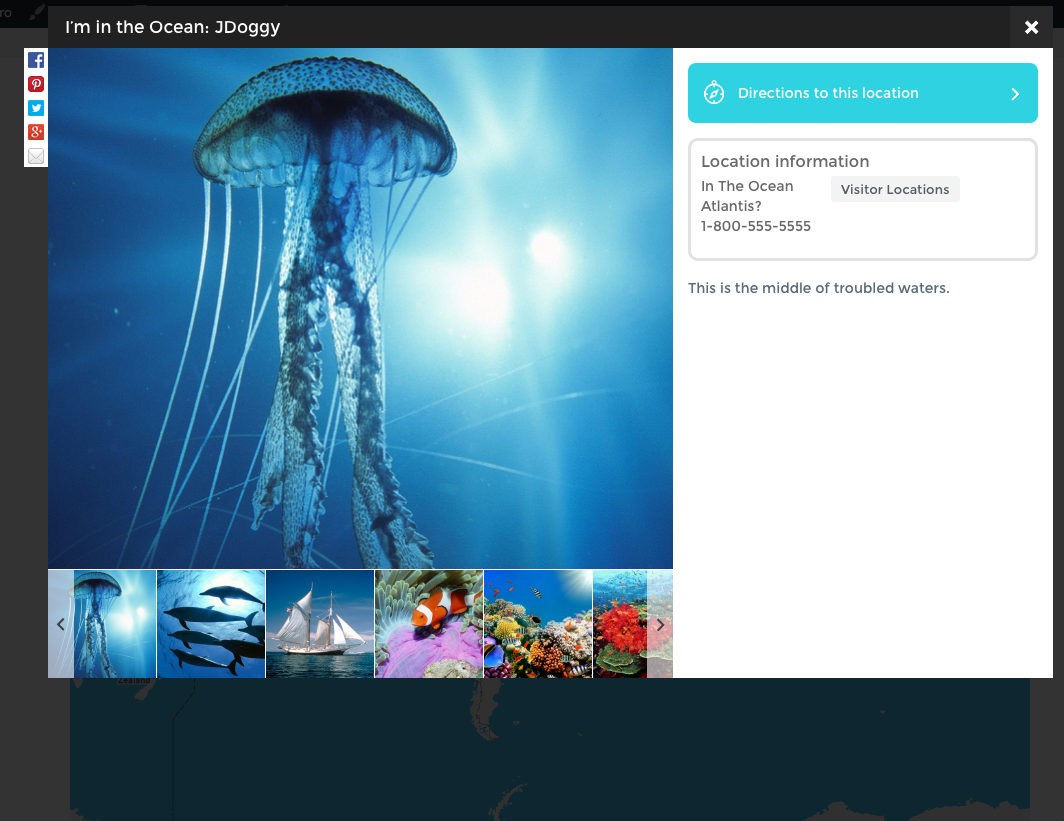
That about covers it! The location will now be live on the map and free for others to enjoy. Each photo, video, and other location details will be presented in a fancy MapifyPro pop-up, as well as a tooltip and location marker of your preference. Visitors to your map will enjoy all of the search, filter, and other features of MapifyPro, and you’ll watch your map fill to the brim with user-generated content! CrowdMaps is easily the best way to let your visitors and customers build the maps with locations all around the world, covering limitless topics and information resources. Other visitors can share locations, and add their own, meaning you have the ultimate Viral Marketing tool at your disposal.
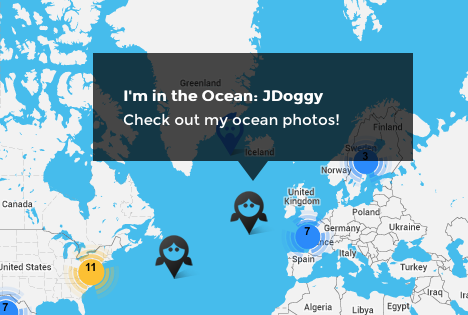
Example of live submitted location
Here’s an idea of how the end product will appear…
Front End Location and Tooltip:
Front End Popup with full details:
Note that CrowdMaps requires MapifyPro. You can bundle up to get both, while saving lots of cash on our bundles page. You may also download a PDF of this documentation here (right click and select “Save linked file” to download). Don’t have CrowdMaps? Get it Here!
Enjoy the plugin, and safe travels!
—The MapifyPro Team