We put together detailed a MapifyLite tutorial to guide you in creating a map on a WordPress website for Free!
If you haven’t downloaded MapifyLite yet, grab it NOW! It’s free and pretty darn cool!
How to Install MapifyLite WordPress Map Plugin
Here’s how to Install MapifyLite on your WordPress site
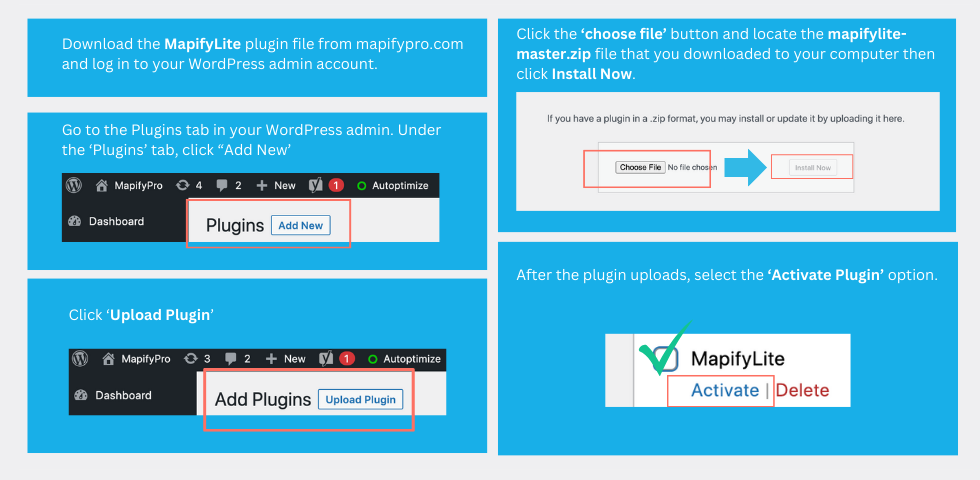
- After you download the MapifyLite plugin file from mapifypro.com, log in to your WordPress admin account.
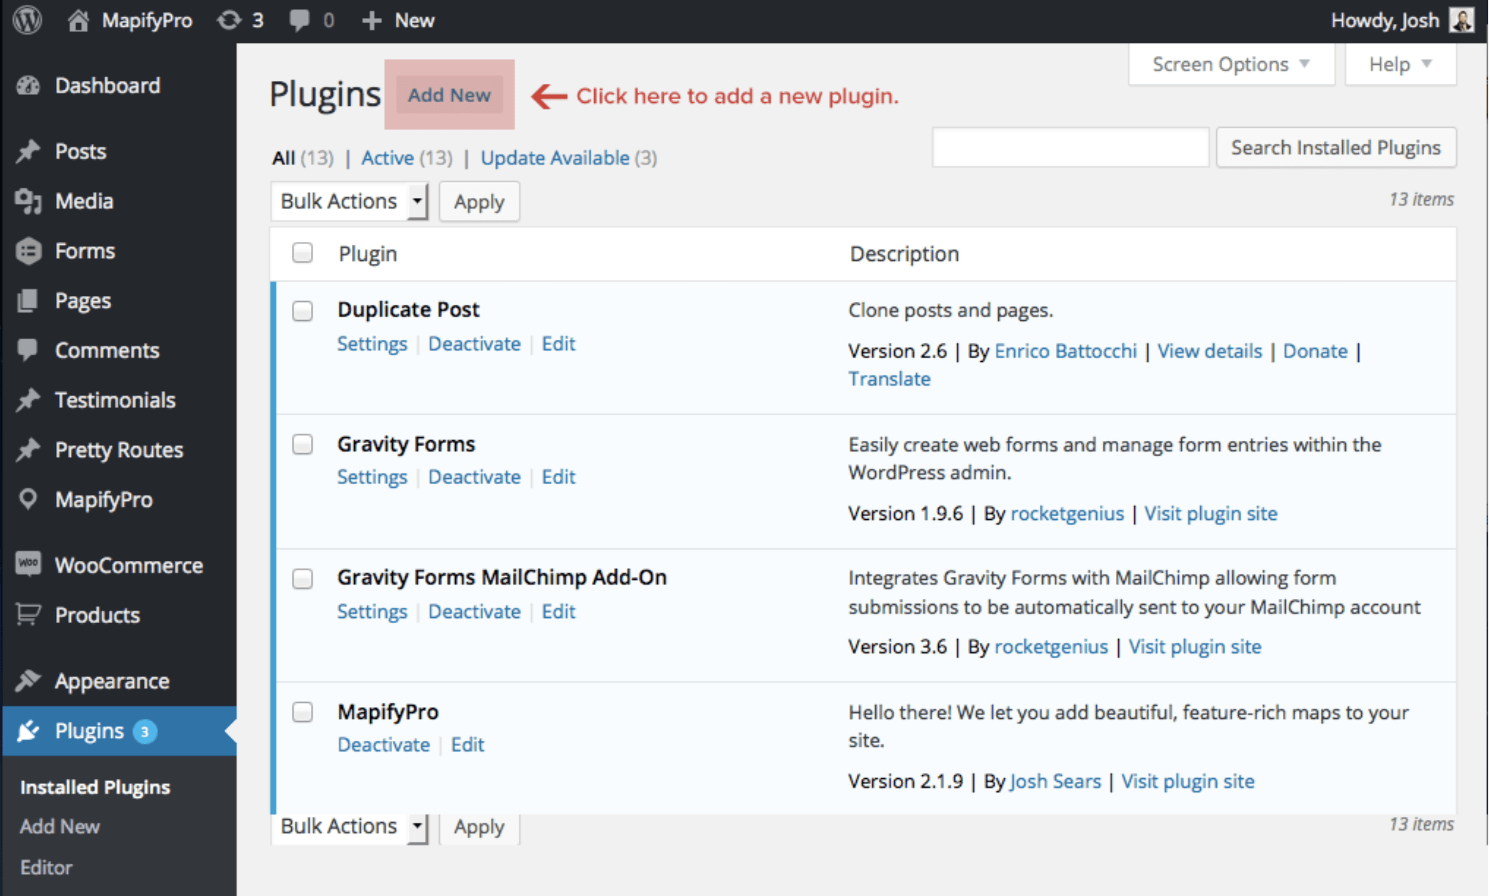
- Go to the Plugins tab in your WordPress admin.
- Under the ‘Plugins’ tab, click “Add New’.
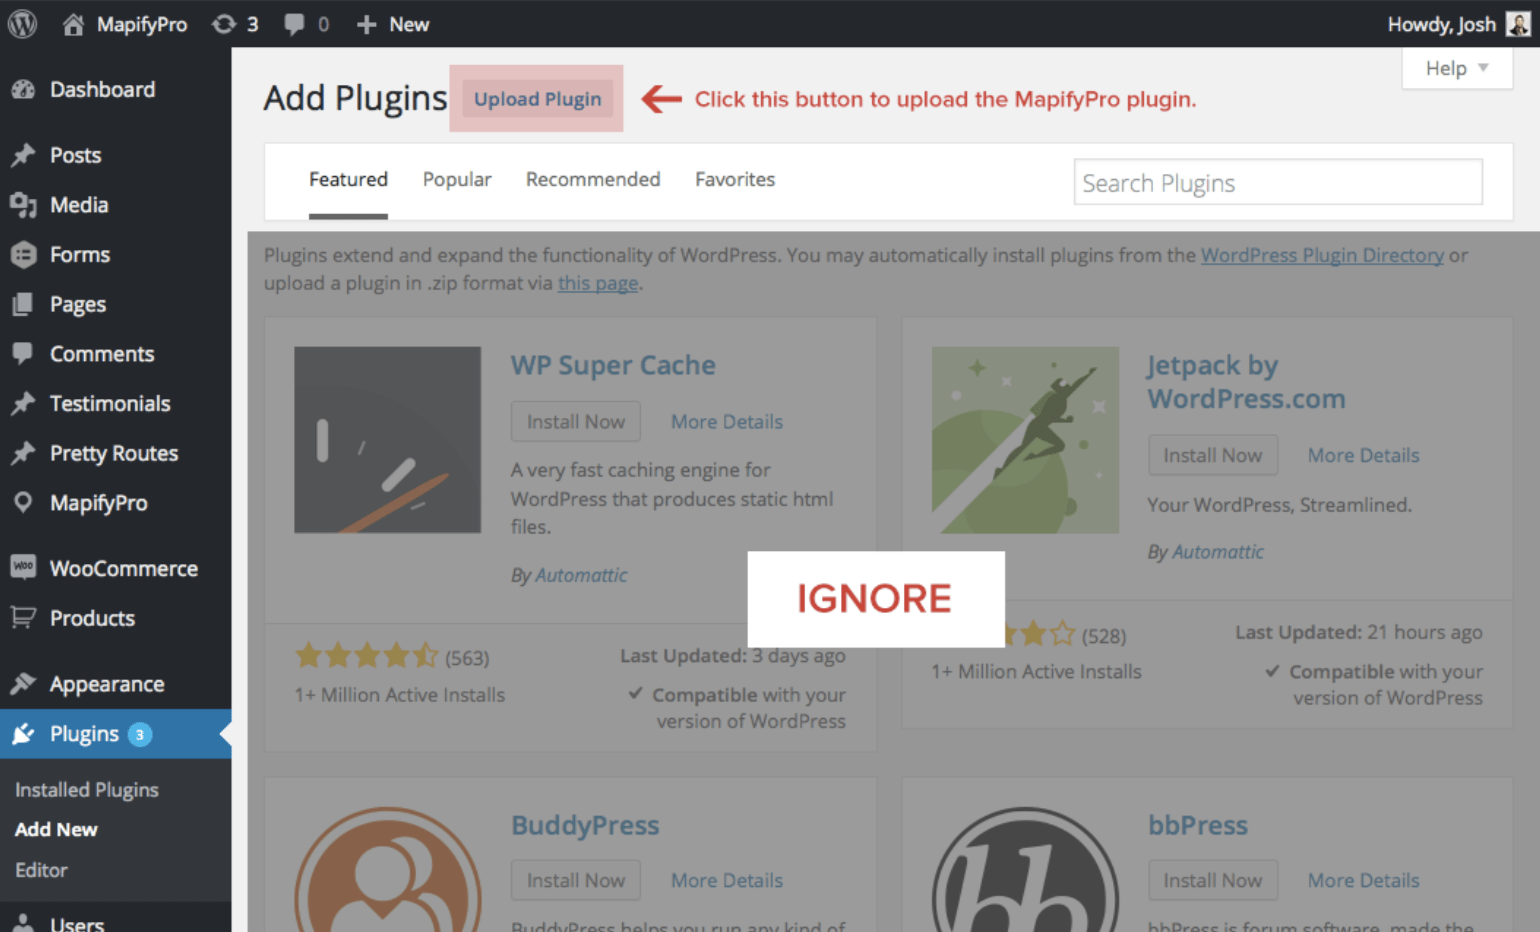
- Then, click ‘Upload Plugin’
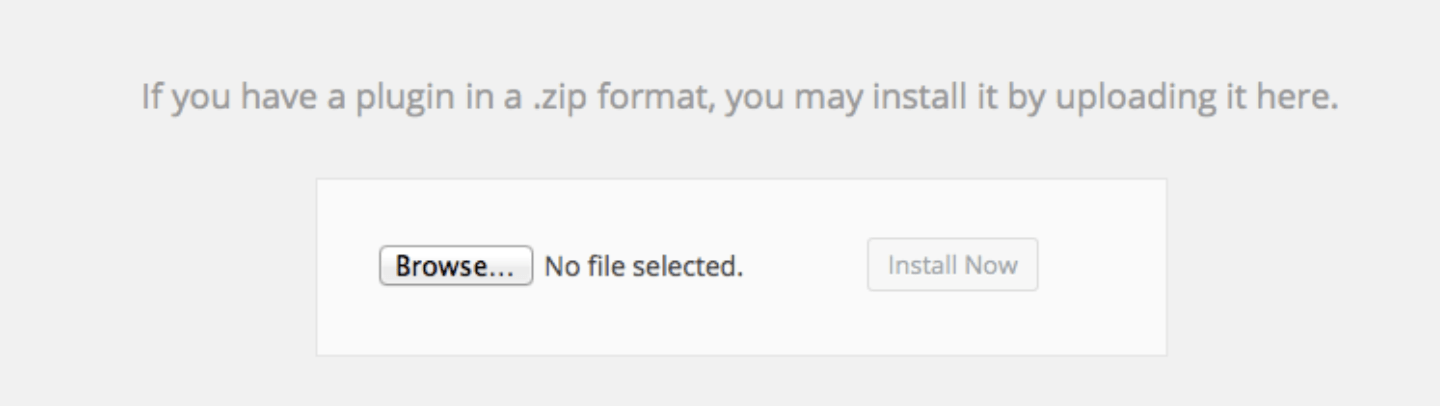
- Click the ‘browse’ button and locate the mapifylite-master.zip file that you downloaded to your computer.
- After the plugin uploads, select the ‘Activate Plugin’ option.
That’s it! You’ve successfully installed MapifyLite.
Now, you’re ready to create your own custom map.
What You’ll See after Installing MapifyLite
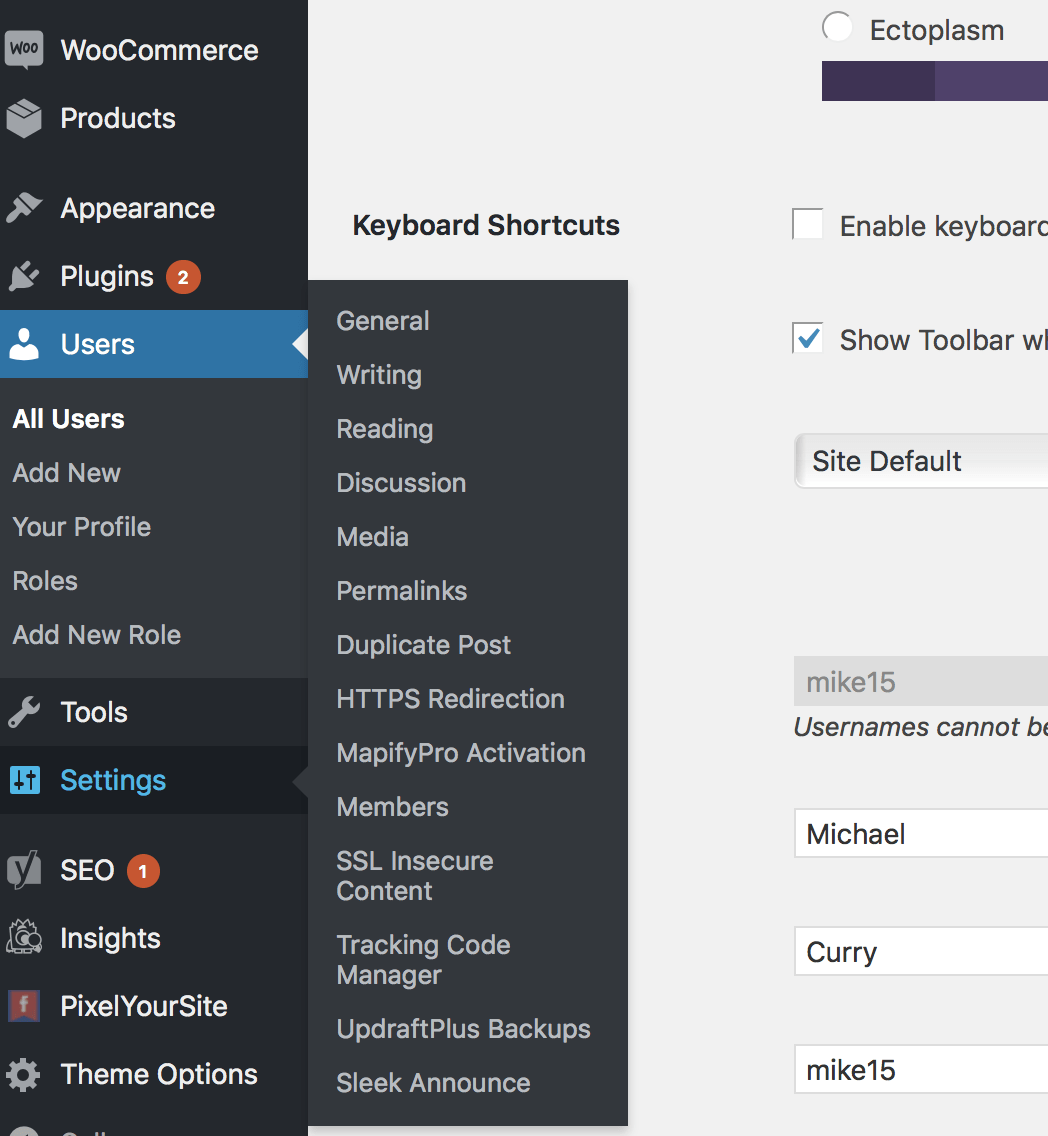
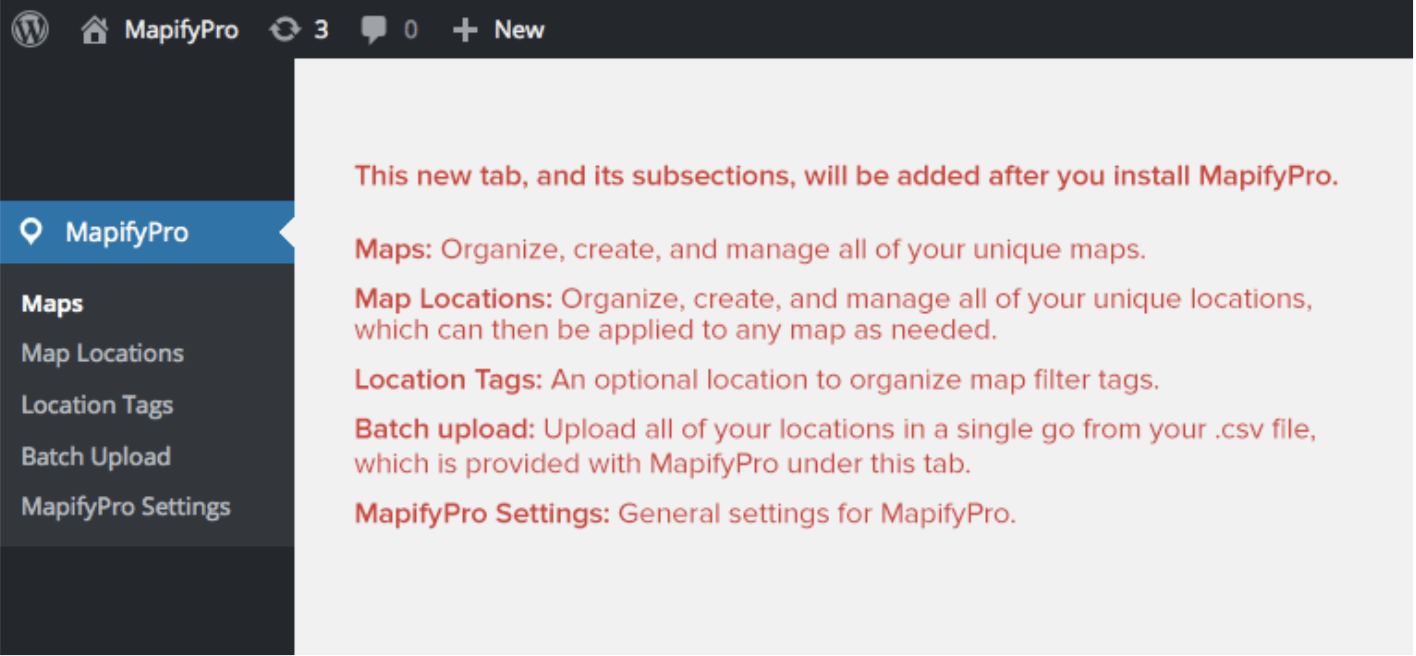
After successfully installing MapifyLite, you’ll notice a new tab has been added to your wp-admin dashboard.
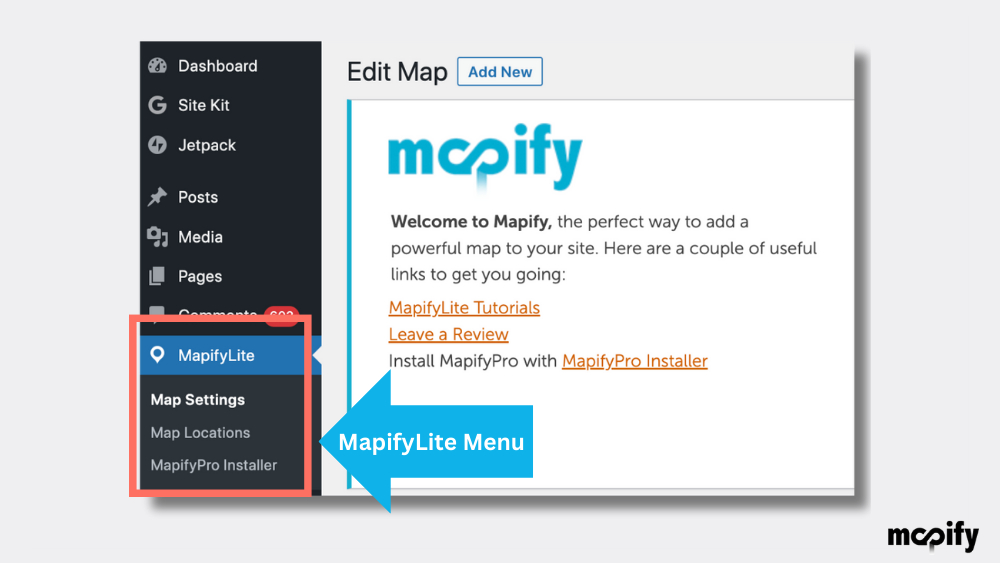
You will see the main tab named “MapifyLite” which includes 3 sub-tabs, namely
- Map Settings
This is where you define your settings for your map. This is the first step in creating your amazing maps. - Map Locations
This is where you will map your pins, define location details, and add map customizations to the map you defined in the Map Settings. - MapifyPro Installer
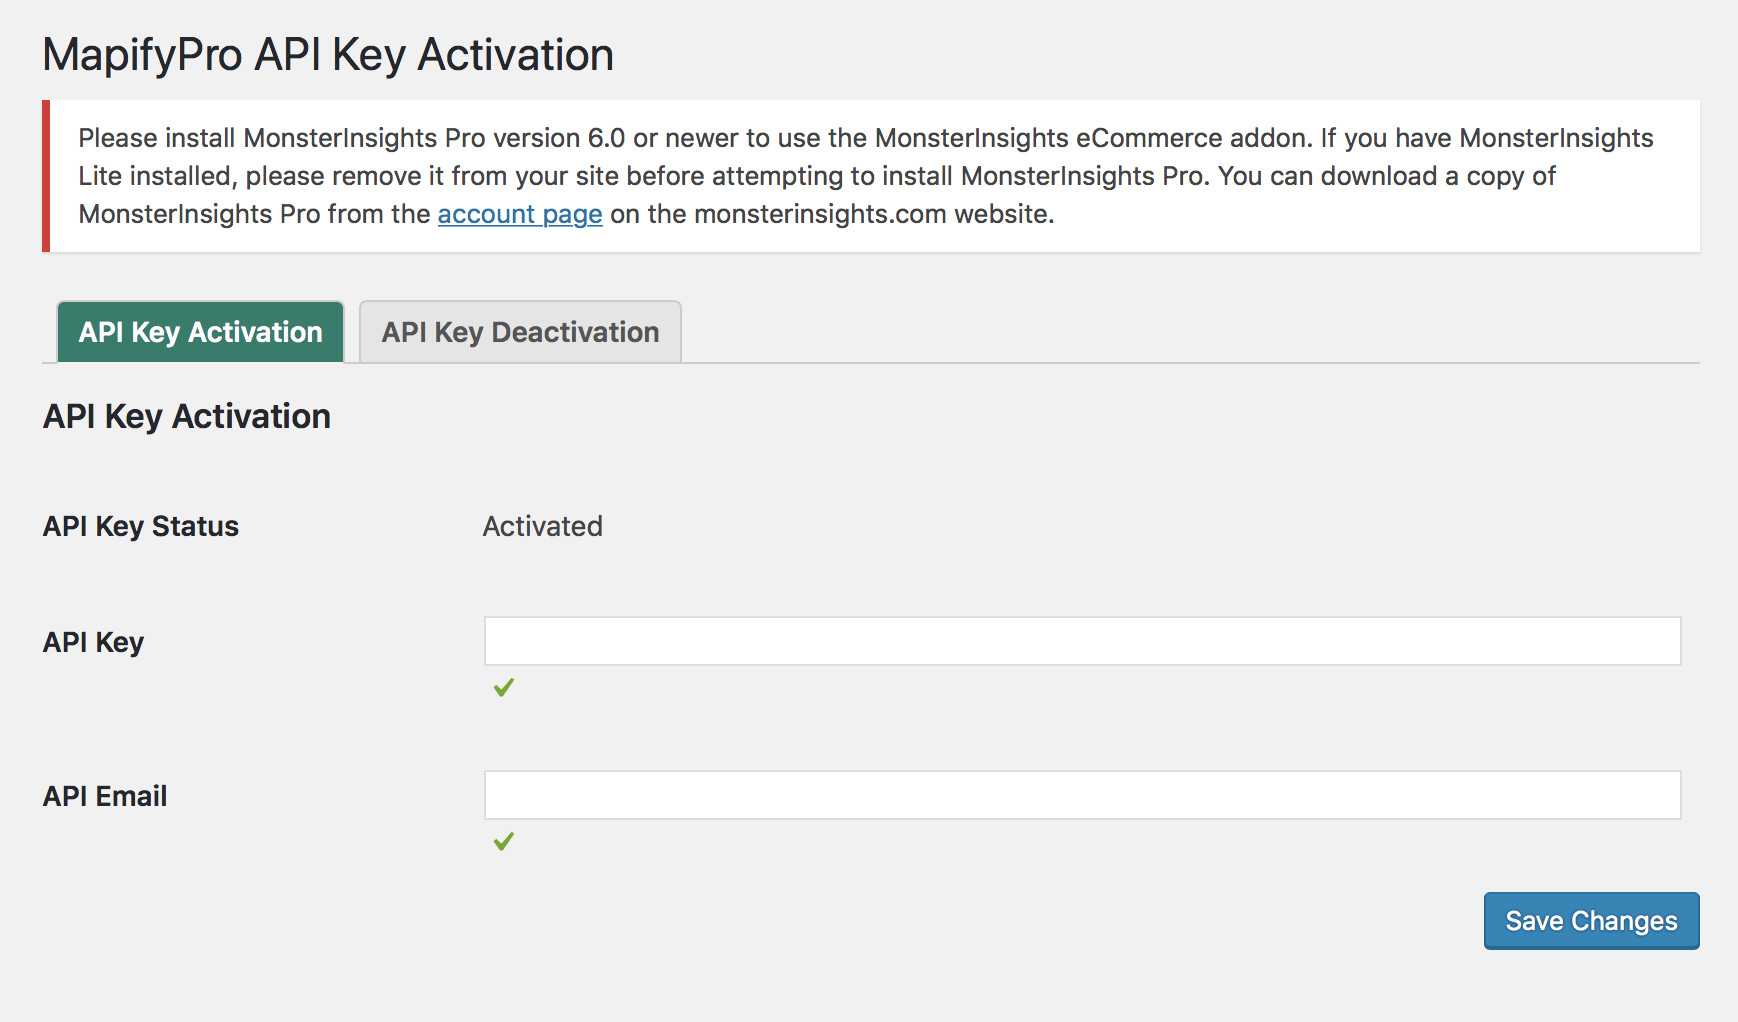
If you would like to explore Mapify’s PRO map features, you can click this tab to unlock MapifyPro’s full potential.
In this tutorial, we’ll walk you through each tab in detail.
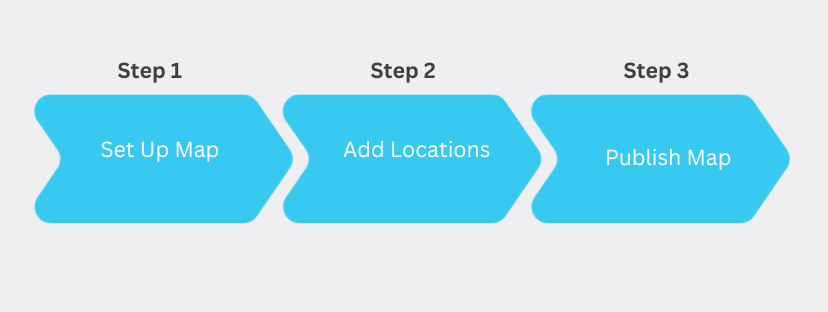
Steps to Create a WordPress Map
I. Map Settings
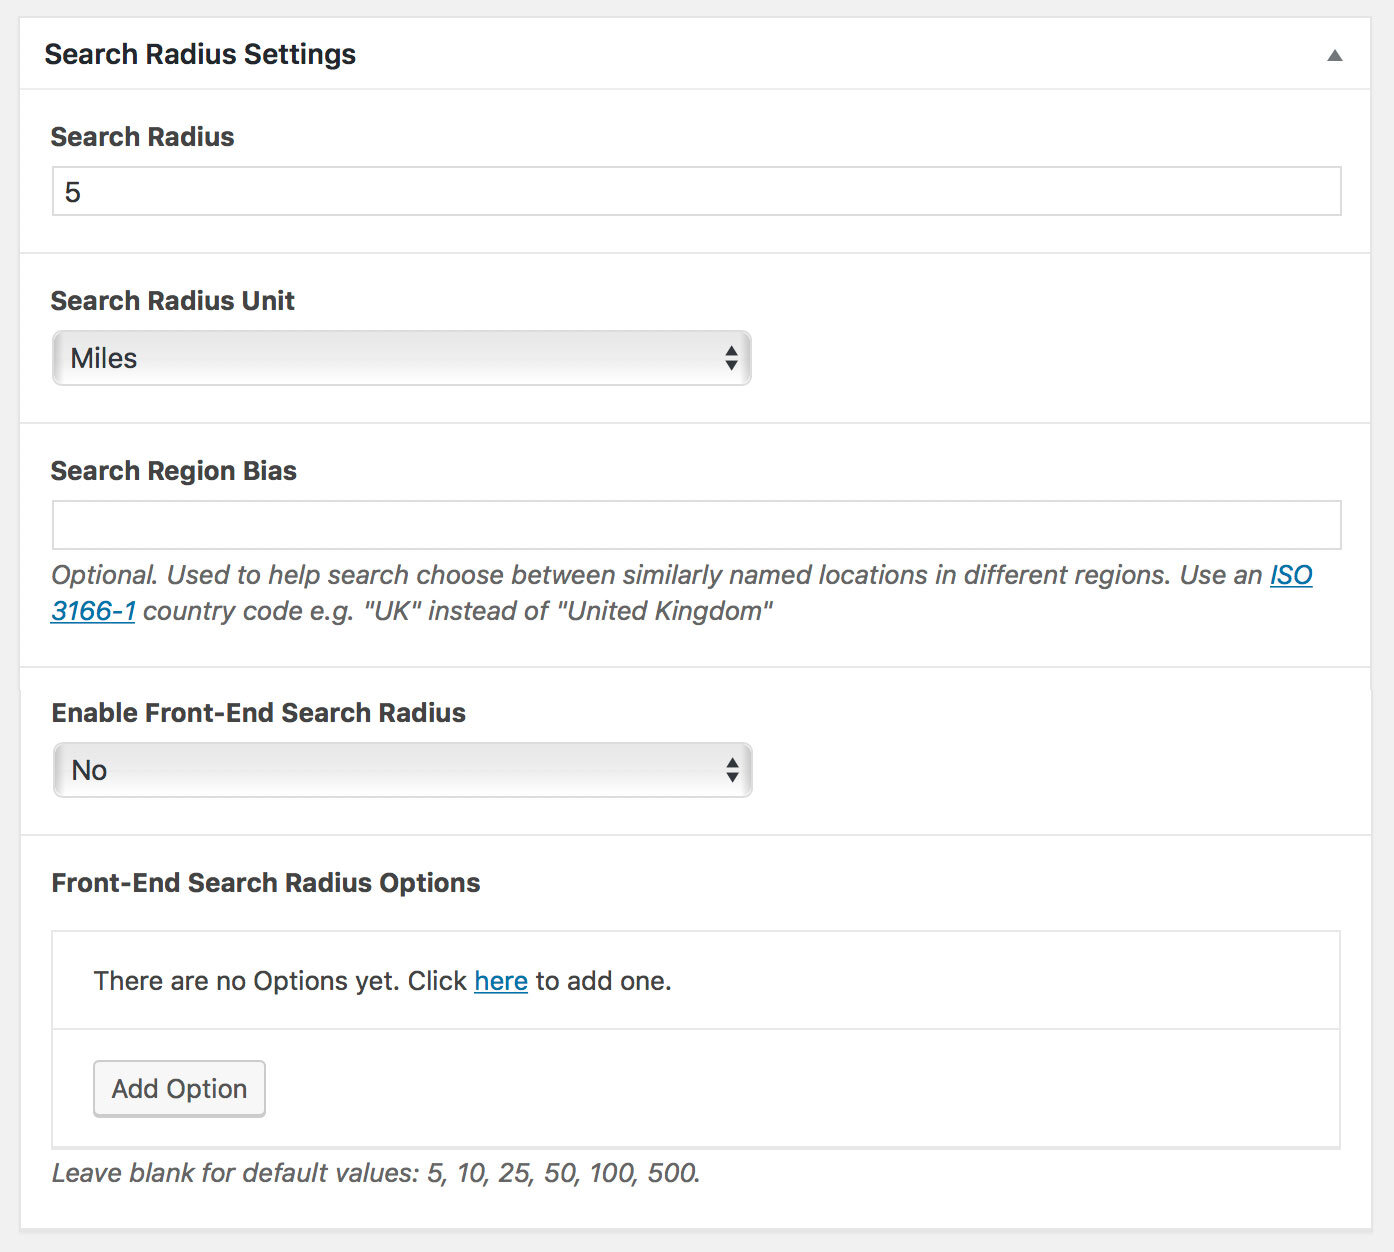
Before you define your map pins and locations, you have to create your map and set up your map preferences first in the Map Settings tab.
There are quite a few options here, but they’re pretty straightforward.
Below you’ll find a detailed graphic explaining each feature.
You’ll want to go through each option and set them according to your needs.
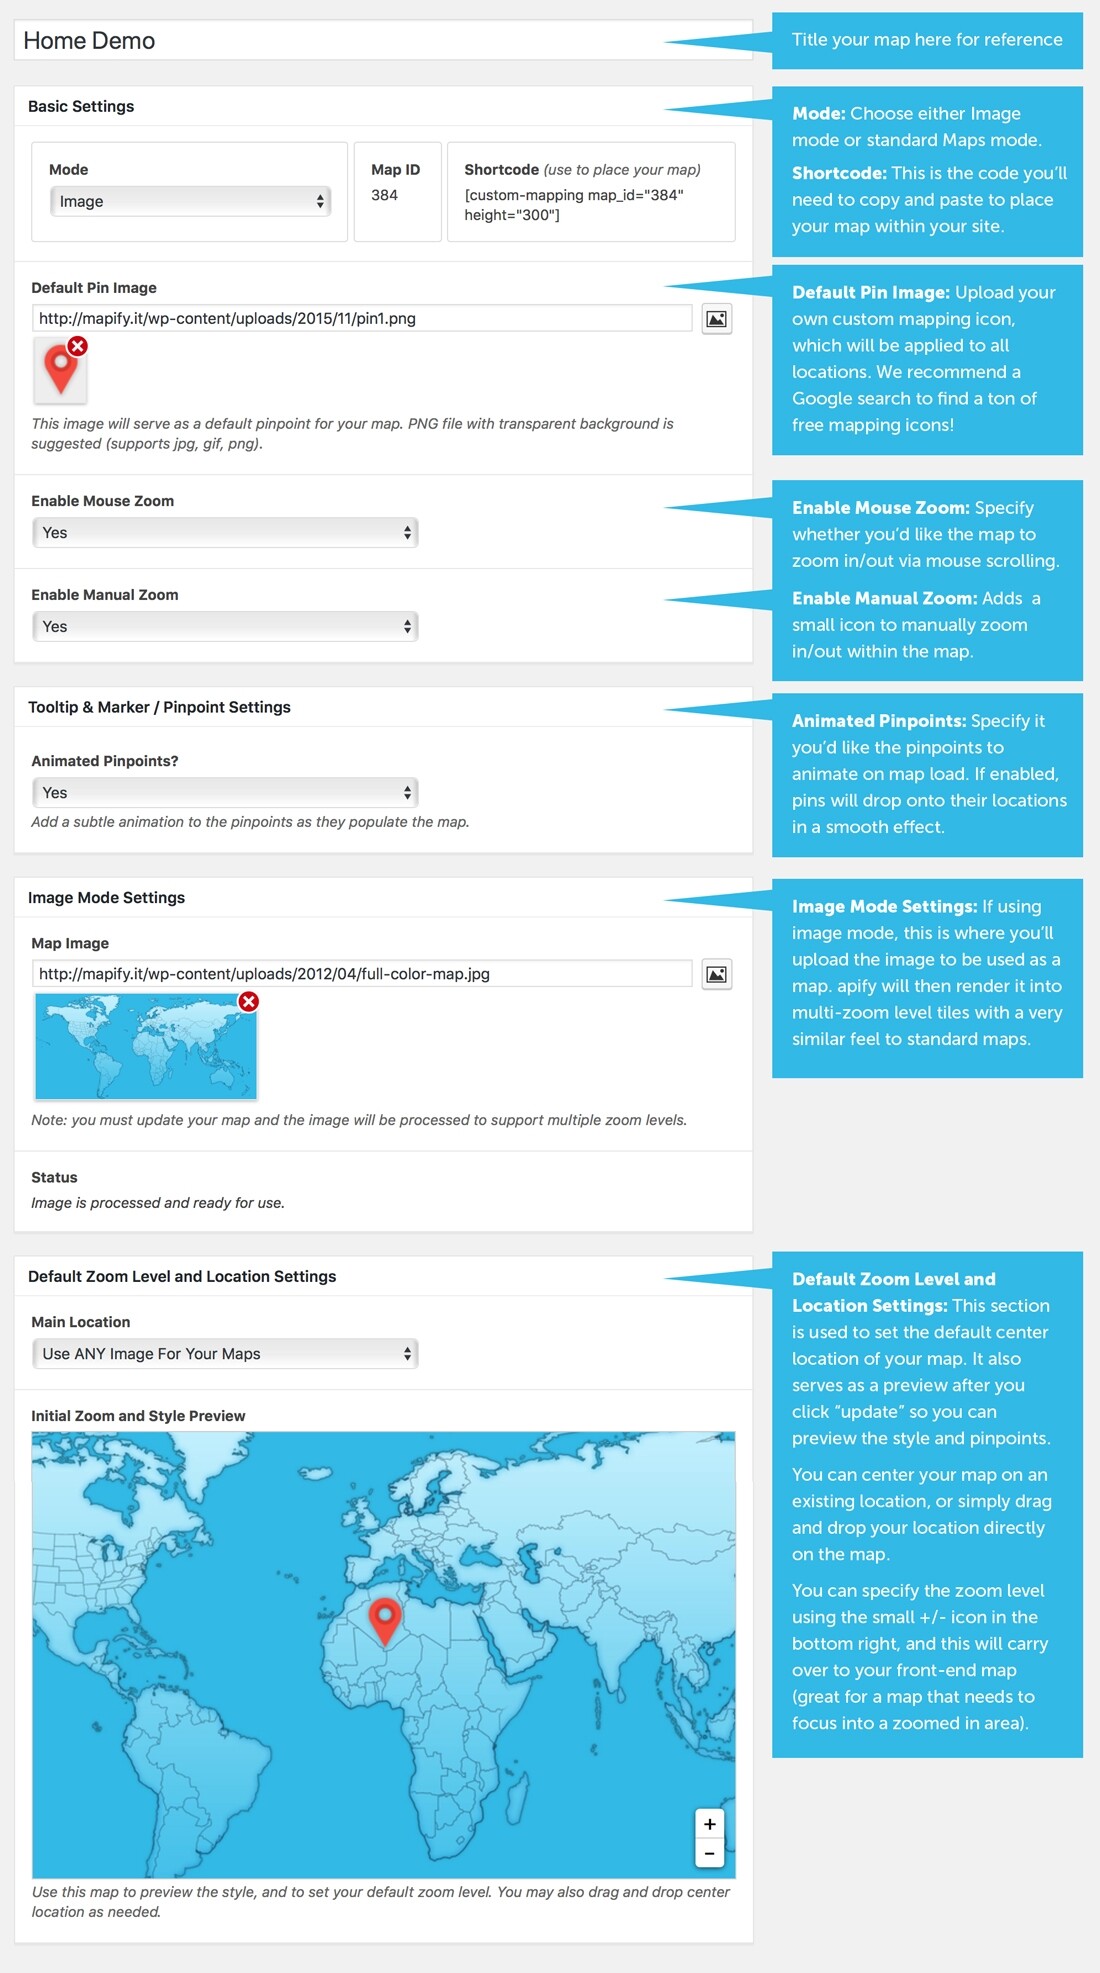
A. Map Title
Name your map here. This title will not display on your front-end map, so you may title it anything for reference.
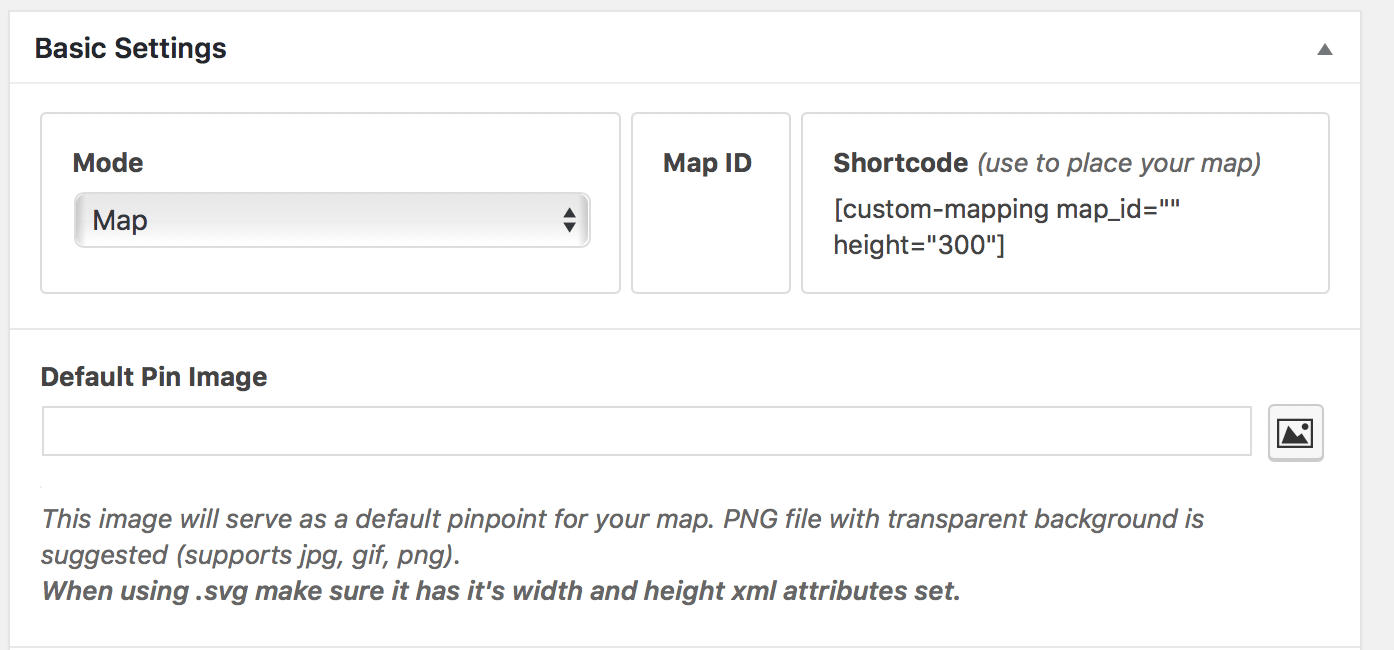
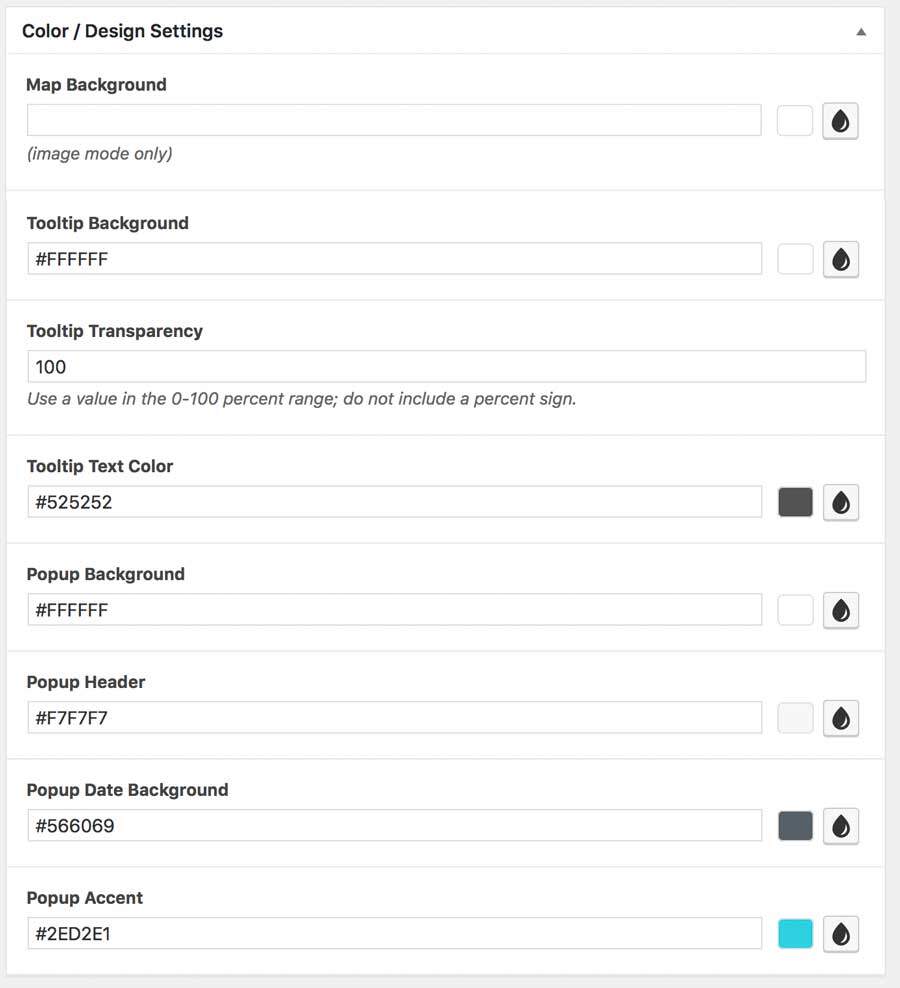
B. Basic Settings
a. Mode: This is where you select standard maps or custom image mode.
What is Standard Map Mode?
By default the map settings will be set to display a Standard Map. This means your map would be like any standard map like Google Maps or Open Street Map. Mapify’s standard map is Open Street Map.
What is Image Map Mode?
If you have your own street map or if you would like to feature specific locations like an amusement park, a zoo, a mall, or a business district, then you would go for an Image Map mode. You can use any image as long as it is in a jpg or png format.
MapifyLite will render this image just like how a Google Map behaves, complete with zoom, pan, and other fun stuff.
Using an image requires you to do the following:
- Set the “Mode” to “Image Mode” at the top of the Map Settings.
- Upload your image in the “Map Image” option.
- Click “Update, Publish, or Save Draft”.
This is a crucial step as it then sends your image to our servers for rendering, and then sends it back to you. You will see a progress status for this process, and it typically takes about 2 minutes (depending on your bandwidth of course). - After rendering, you will see the image in the map preview area.
Tips for Image mode
We highly recommend using the largest (in width/height, not file size) image you can find. This will result in a better map that can be zoomed in on the details.
However, to do this you’ll want to optimize your image to find a balance of clarity and file size.
The beauty of this technology is that it will take a very large file (file size) and render it to quickly display. However the larger the file size, the longer it will take to render, so keep that in mind.
We recommend keeping the file under 2mb though it can handle much larger files (but will take longer to render).
b. Map ID: After publishing/updating your map, your Map ID will display here. You don’t need to worry about this number as it’s just for reference.
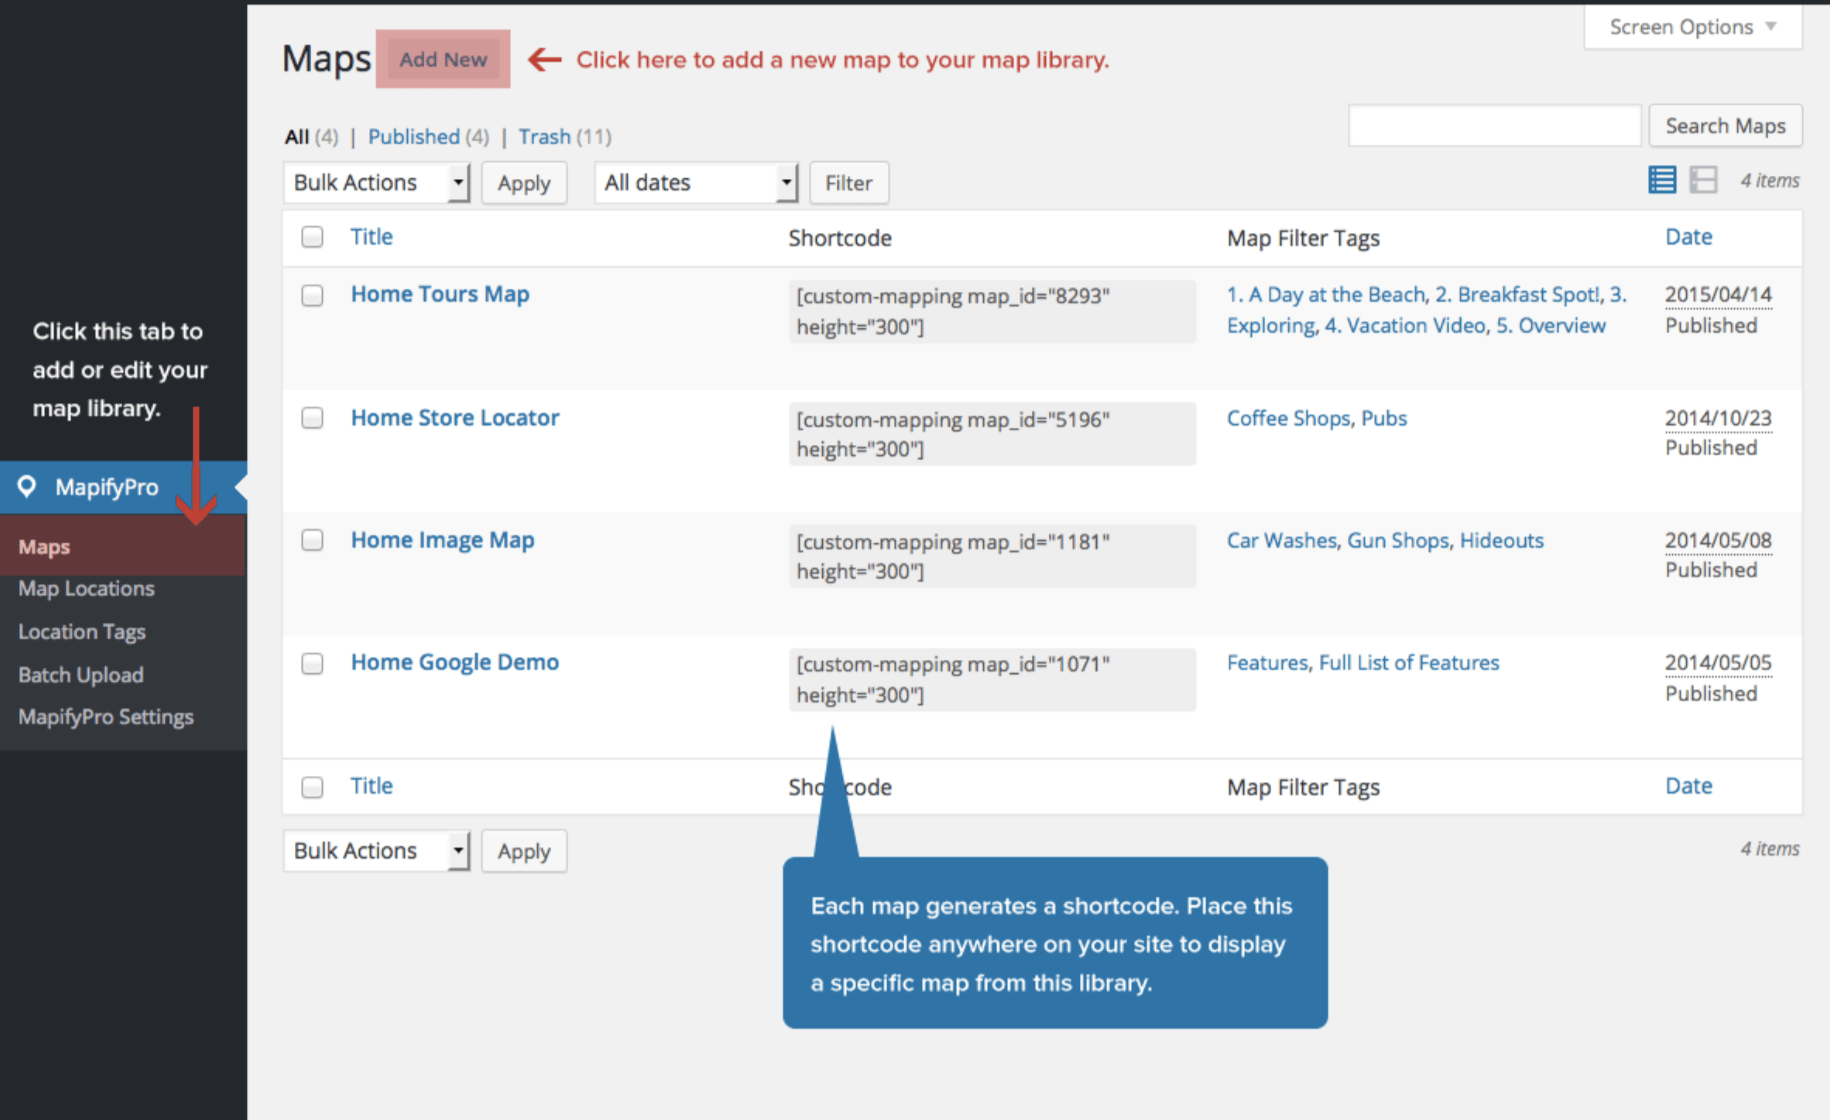
c. Shortcode: This is the code you’ll use to paste your map anywhere on your site. Simply copy and paste this full code to place this specific map.
Note that the shortcode contains the Map ID, and the height/width parameters (which dictate the size of your map when it displays on the front-end.
d. Default Pin Image: This is the small graphic you’ll want to use as the default pinpoint/marker for each location.
You can add a different pinpoint graphic to each location, but if they are not specified in the Location Settings, then the system default will be the PIN graphic that will display instead.
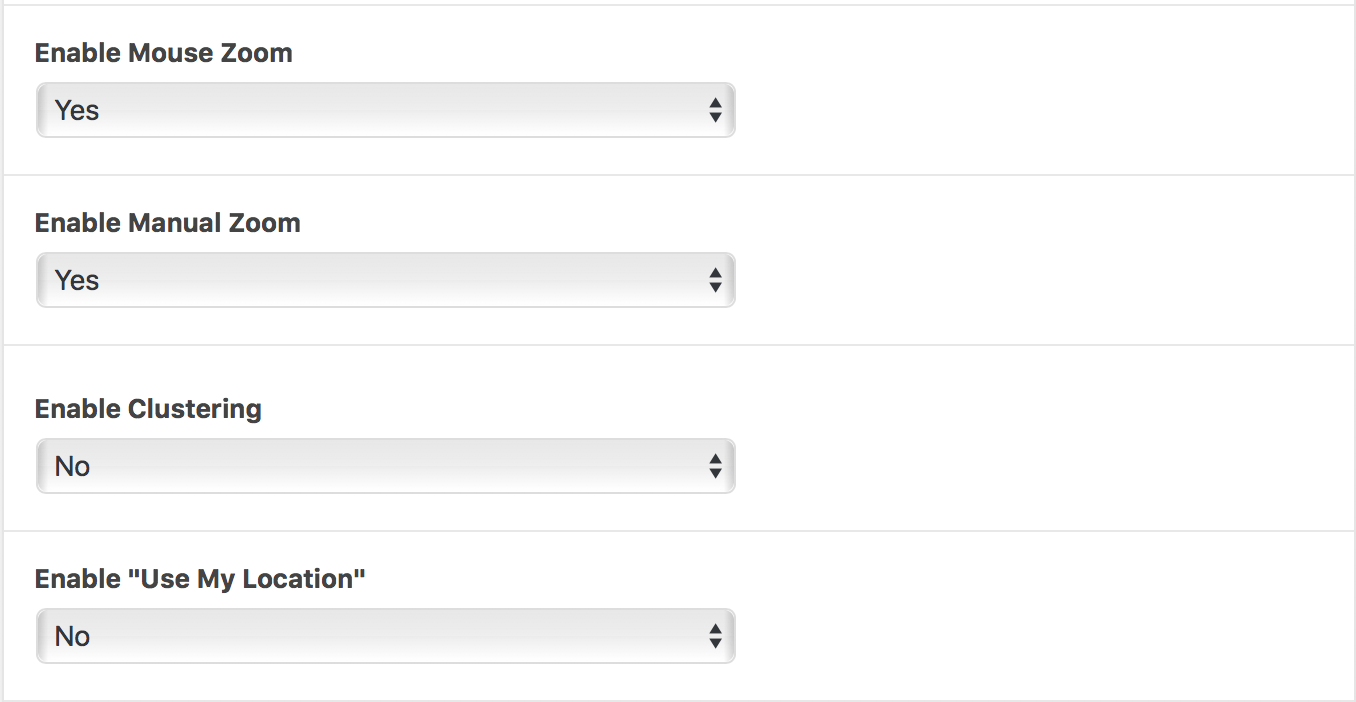
e. Enable Mouse Zoom: This enables zoom via mouse scrolling. Note that this can be annoying on mobile devices or fullscreen maps as it can cause the user to get “stuck” in the map when trying to scroll. In this case, we suggest turning this off.
f. Enable Manual Zoom: This adds the +/- icons for manual zooming on the map via clicking.
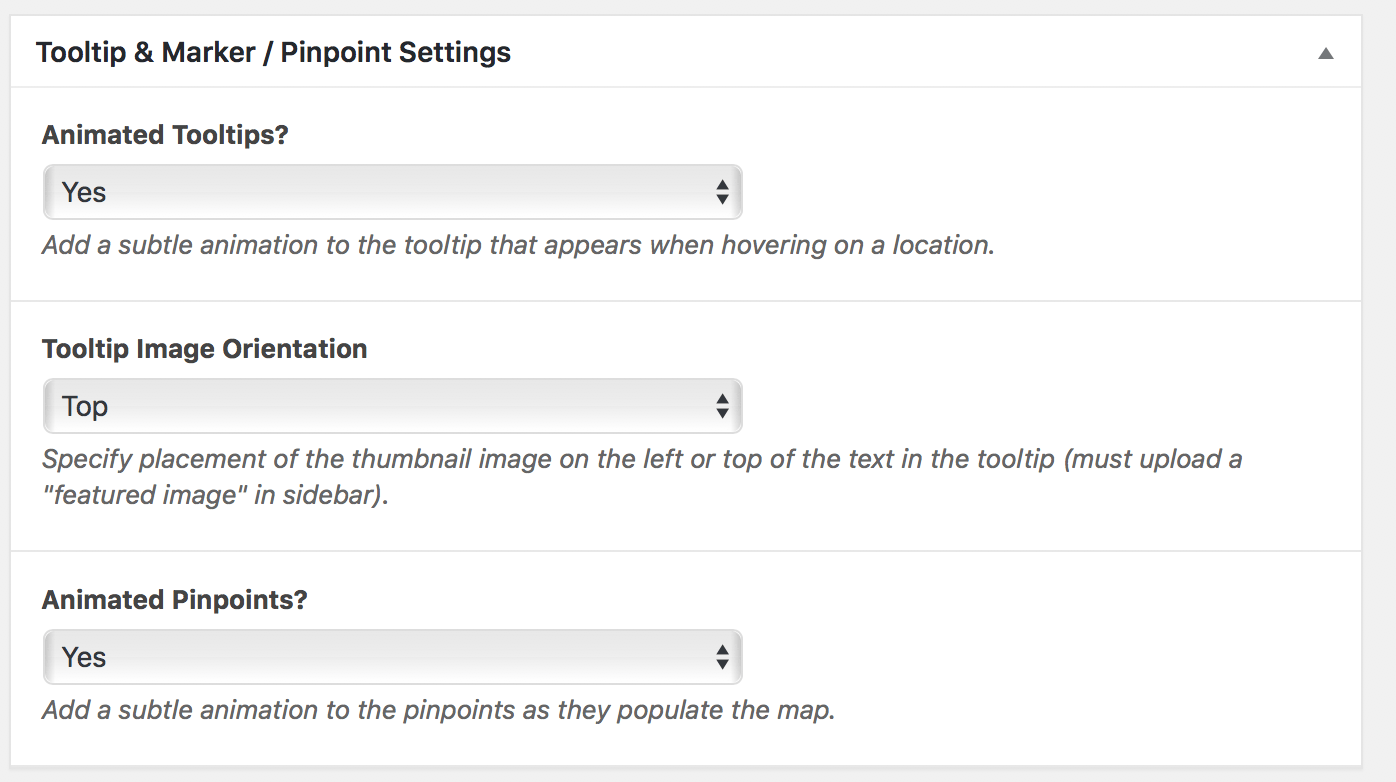
g. Animated Pinpoints: This setting allows you to specify if you’d like to enable the subtle tooltip animation. When enabled, the pinpoints will appear to fall onto the map with a subtle bounce effect.
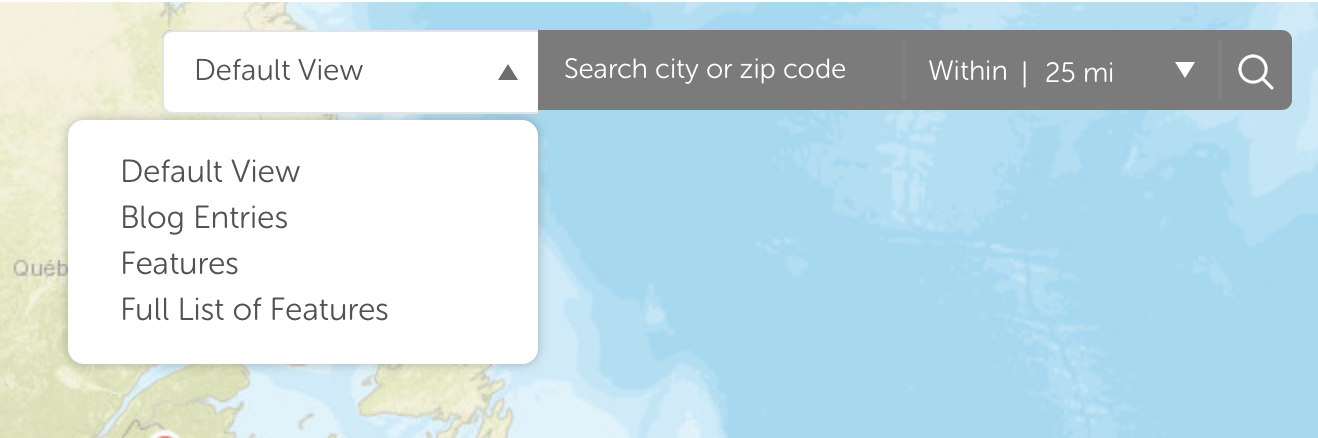
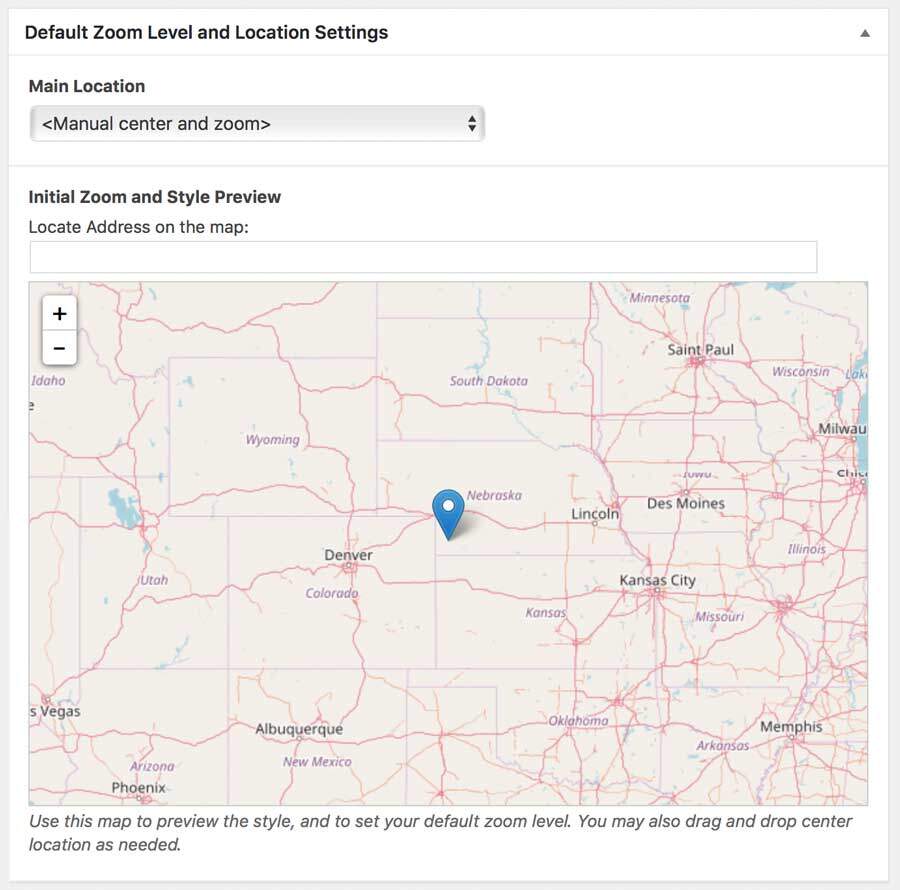
h. Default Zoom Level and Location Settings: In this final section, you’ll specify the details on how you’d like your map to appear on the first view when a user visits your map on the front end. Details are outlined below this image:
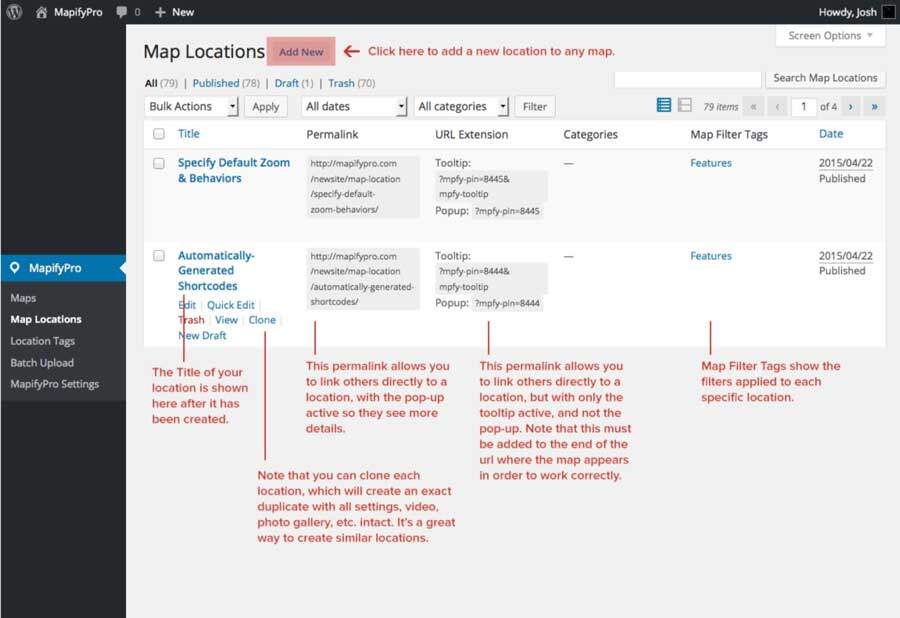
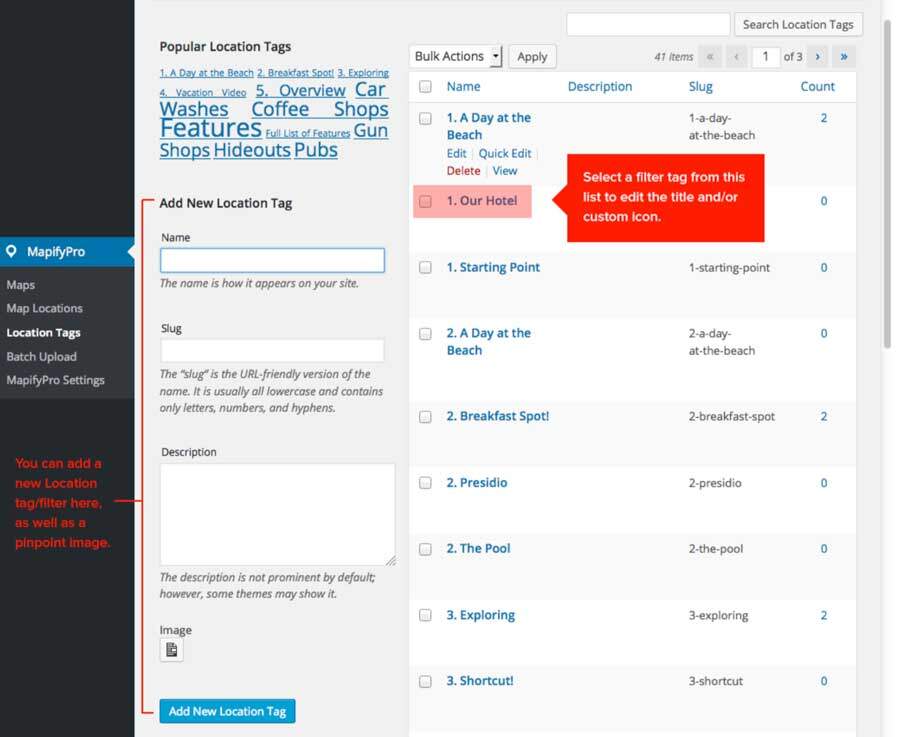
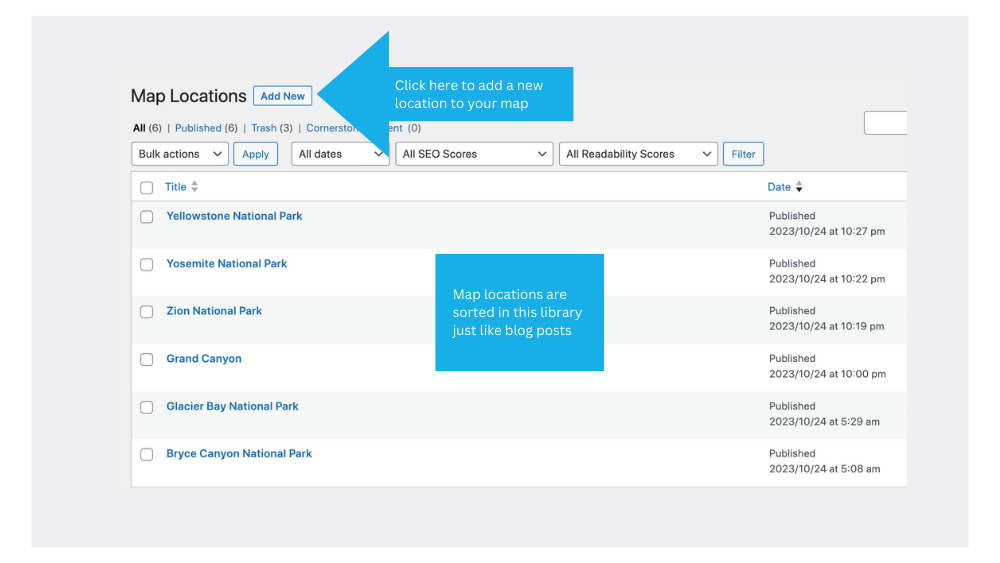
II. Map Locations
After setting up your map, you can start adding locations! Go to the Map Locations tab.
You can add as many locations as you need in this tab. It is just like adding a new web page or blog post, so the process will be very familiar if you are a WordPress user.
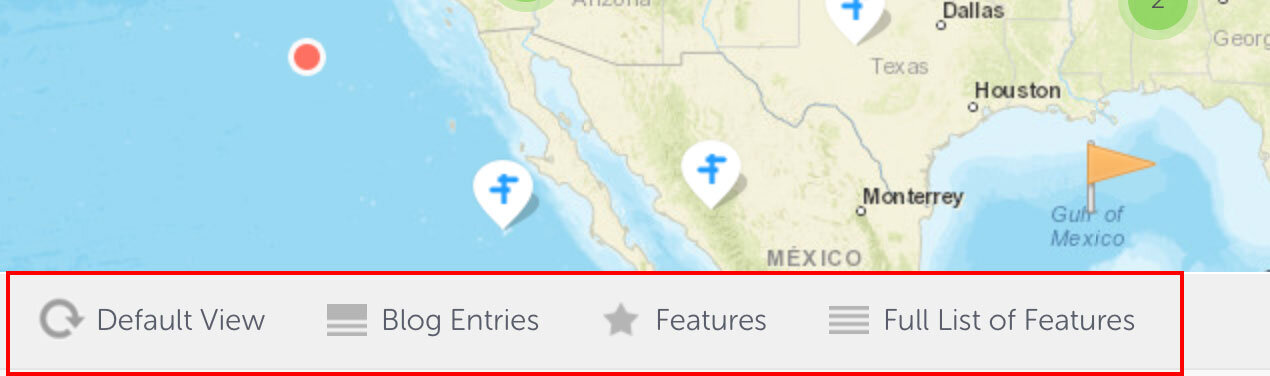
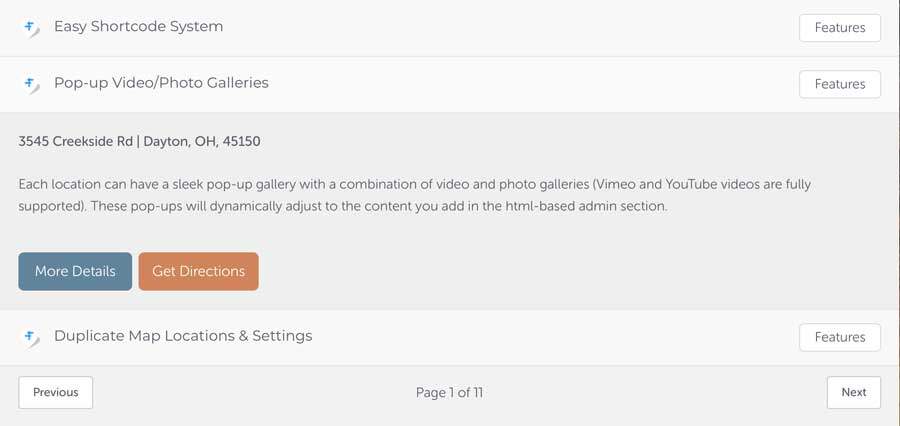
Map locations will be organized as shown below
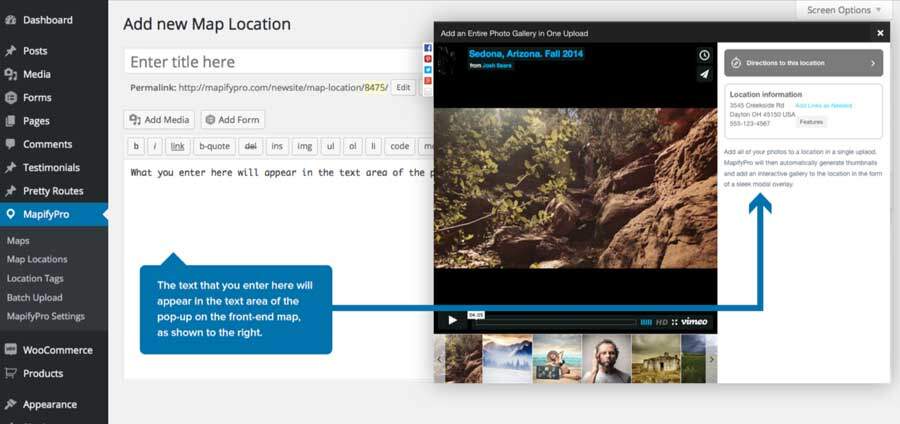
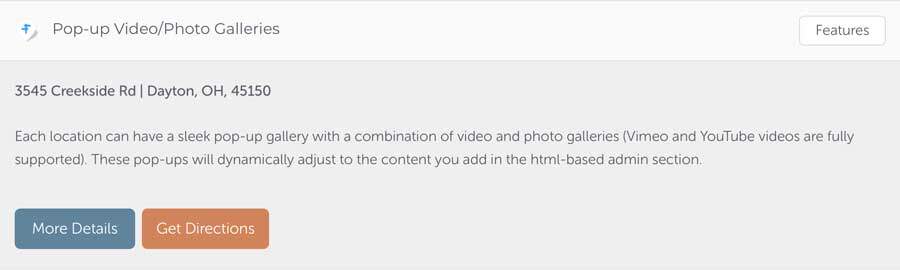
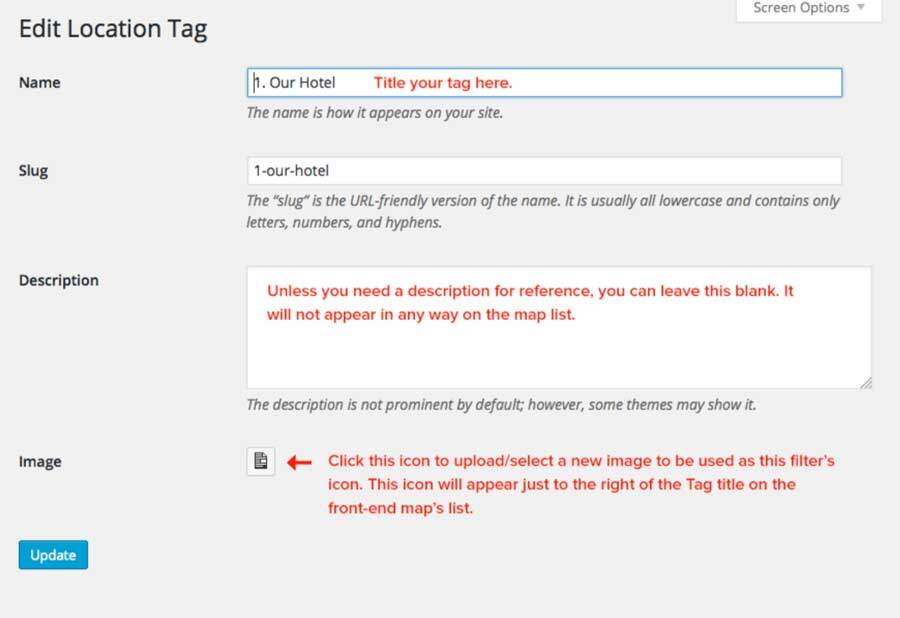
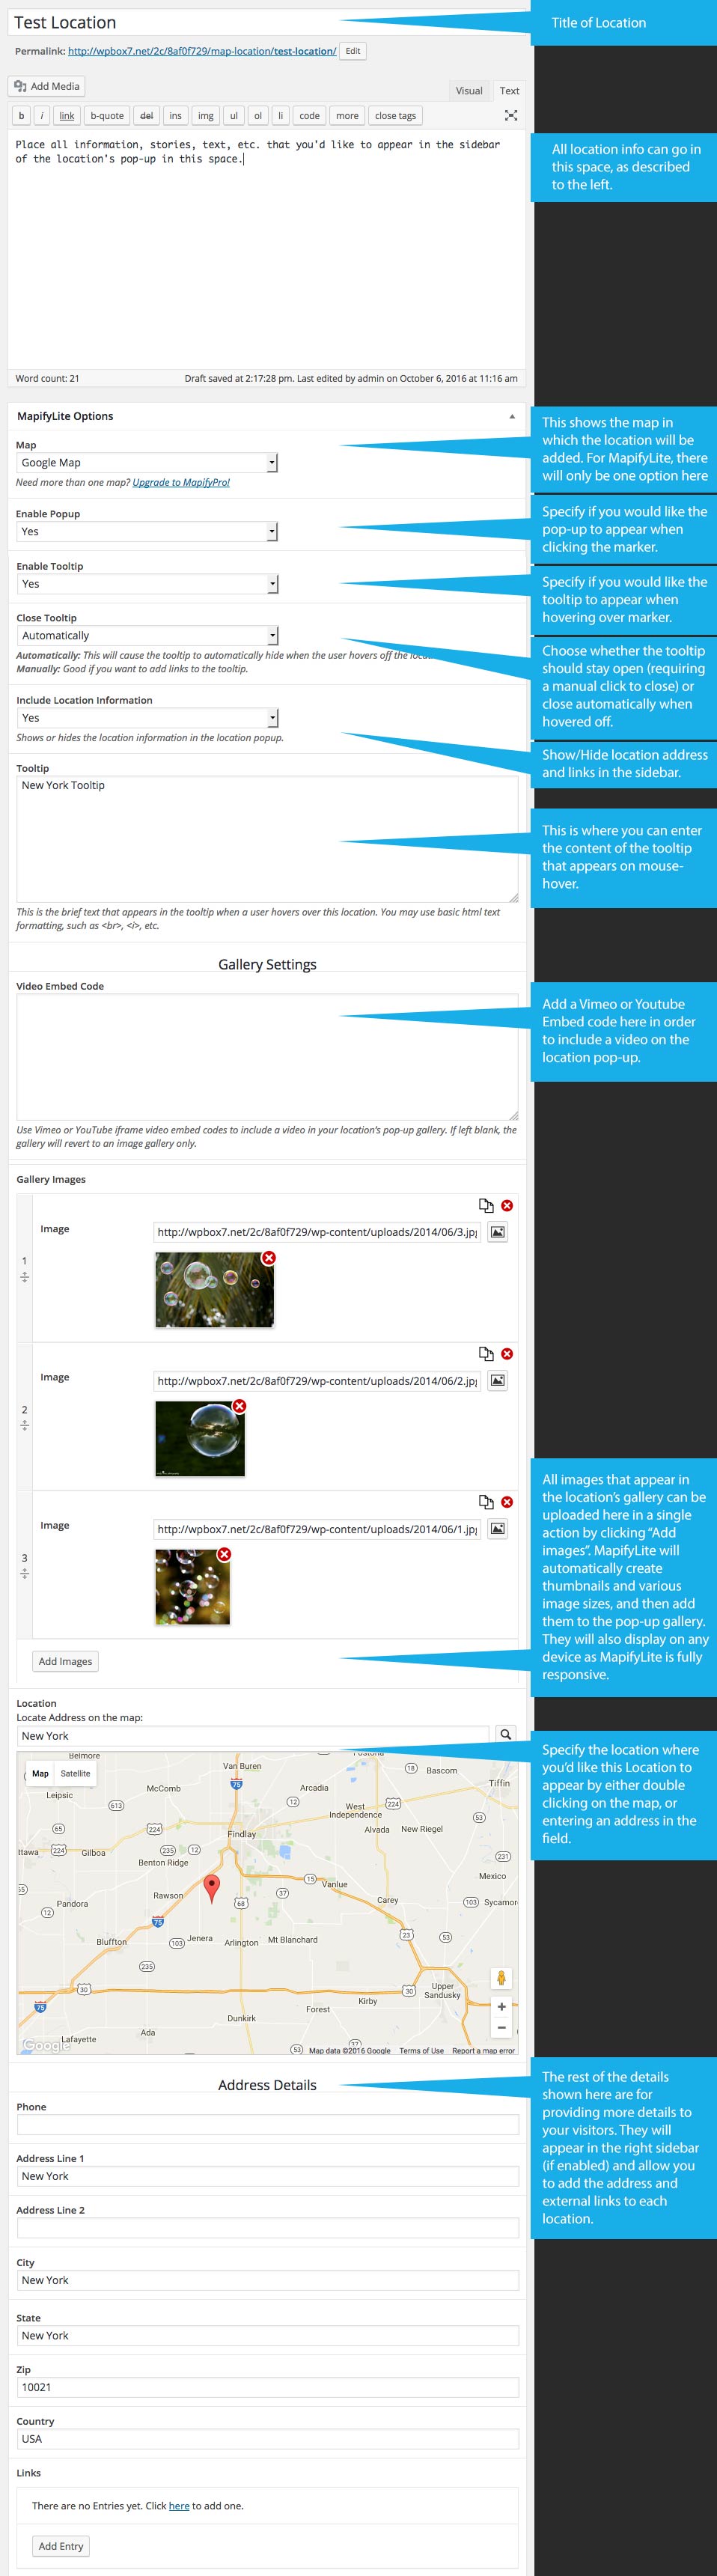
Location Details
Each location is set up independently so that they can be as unique as needed.
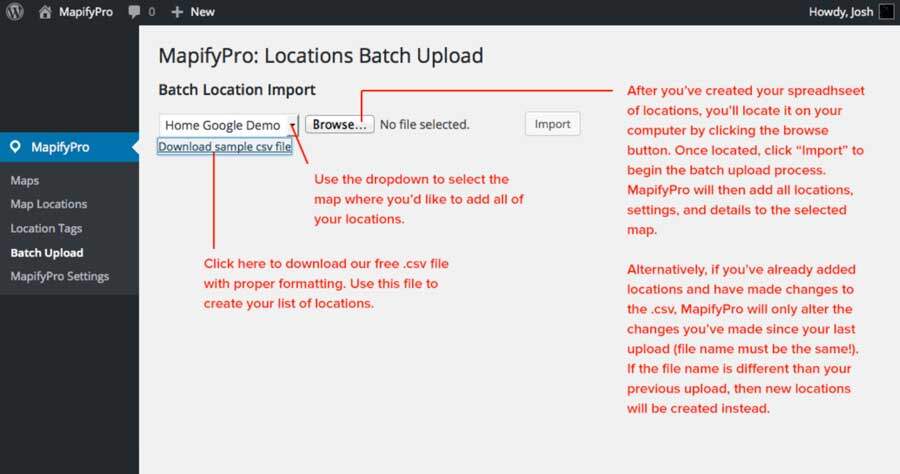
If you’d like to bulk upload every location in a single action, you may be interested in the Bulk Upload feature available with MapifyPro.
Below you’ll see the full rundown of every feature available when adding a location to your map:
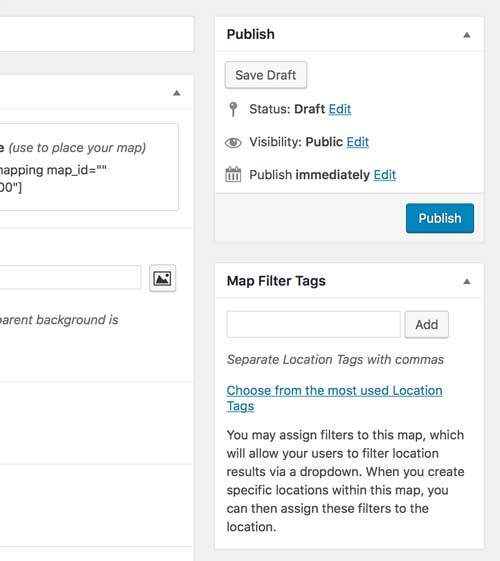
III. Publishing Your Map
Now that you’ve added all locations and your map preferences, you can easily paste it into a page or post on your site.
To do so, you’ll want to copy and paste your shortcode. This shortcode is generated automatically and placed at the top of your Map Settings page.
It’ll look like this:
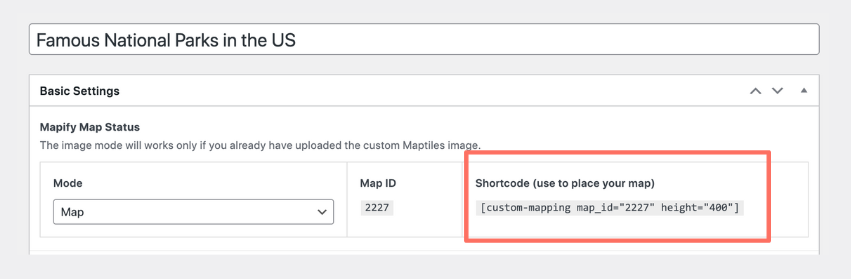
Or you can copy and paste this one (just change the map_id to what you see on your screen)
[custom-mapping map_id="2227" height="400"]Note that there is a height parameter in there. This can be changed to any height you need to adjust the height of the map. Further, you can add a width parameter as well. Here is the full code with both:
[custom-mapping map_id="2227" height="400" width="500"]Keep in mind: This shortcode WILL NOT overwrite your theme’s CSS settings.
So, if you publish the map on a page that restricts the width to 450px, the map will not force a larger map area based on the shortcode.
You’ll have to change the Theme CSS as well if this is the case.
You’re good to go!
That covers the full overview of MapifyLite!
If you need more features, feel free to grab yourself an upgrade with MapifyPro as it is by far the most powerful mapping plugin available for WordPress, with TONS of additional mapping features.
Even better, you can seamlessly upgrade without losing a single map setting from MapifyLite.
FAQ
What will I see after Installing MapifyLite?
After successfully installing MapifyLite, you will notice a new tab has been added to your wp-admin dashboard. It is called “MapifyLite” and it includes 3 subtabs, namely Map Settings, Map Locations, and Upgrade to MapifyPro.
How do I create a map on my WordPress website?
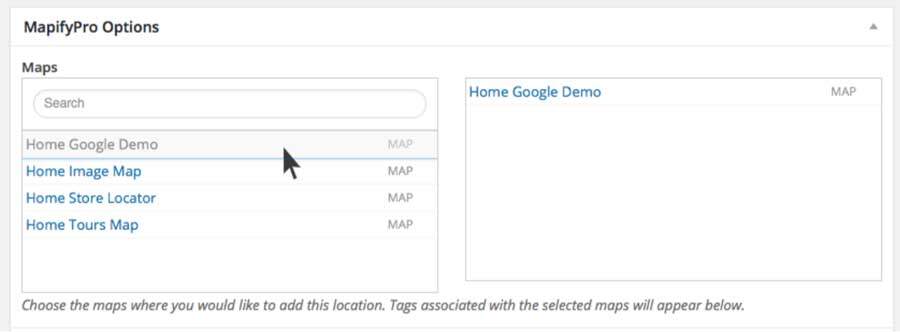
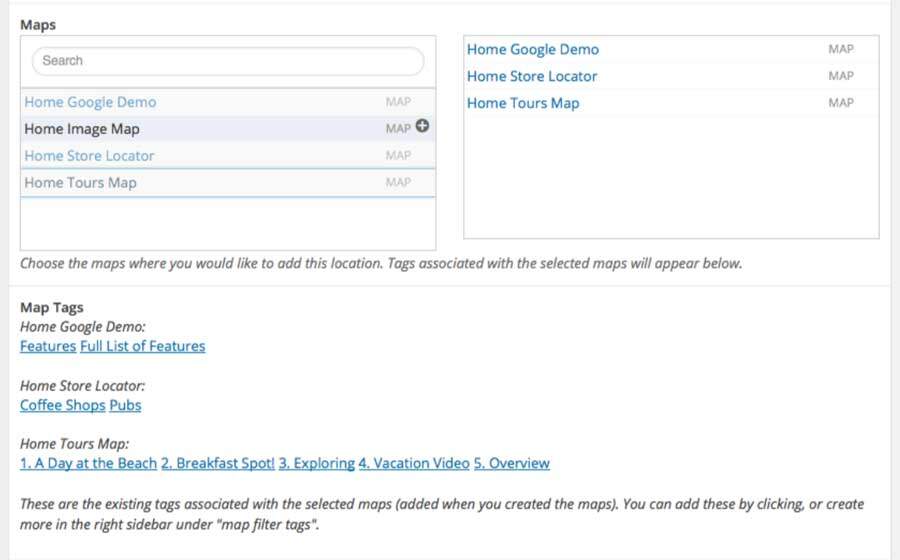
First, you have to set up your map preferences in the Map Settings tab. Here, you’ll define the map name, map mode (if using a standard map or image map if you have your own map), how the location pins would display, and the default map zoom view.
Next, on the Map Locations tab, you’ll create the specific locations that you want to pin on the map. You need to create one location for each location that you want to feature or pin on your map. In this section, you can add images and videos you want to feature for every location.
Finally, just copy and paste the map shortcode on the webpage where you want to display your map.
I have my own map image. Can I use this instead of the default map?
Absolutely! Just follow these steps:
1. Set the “Mode” to “Image Mode” at the top of the Map Settings.
2. Upload your image in the “Map Image” option.
3. Click “Update, Publish, or Save Draft”. This is a crucial step as it then sends your image to our servers for rendering, and then sends it back to you. You will see a progress status for this process, and it typically takes about 2 minutes (depending on your bandwidth of course).
4. After rendering, you will see the image in the map preview area.”
Can I create several maps on my website?
With MapifyLite, you can only create one map per website. But you can upgrade to MapifyPro so you can create Unlimited Maps per website plus a ton of amazing mapping features like bulk locations upload, bulk images upload, add map routes, add directions, share to social media, and so much more. Here’s a complete list of MapifyPro features.
Will I lose my map in MapifyLite if I upgrade to MapifyPro?
You’ll definitely keep all your maps when you upgrade to MapifyPro. We made sure you won’t lose all your time and effort creating your amazing maps with MapifyLite.
How much is the Mapifypro?
You can check the features and price comparison for MapifyLite and MapifyPro on our pricing page.
Filed under: Tutorials